In this photo Bill K. is fitting a trim piece that will go on the ceiling at the top of the end cabinet,
This is a view of the corner of the clerestory after the trim piece has been nailed on.
Next the wood trim on the clerestory window pillars was installed. In this photo Dean is measuring to cut a piece for the wide pillar.
This photo shows one of the wide pillars that is finished. These wider pillars are located where the seat backs come together and allow for a (very) little separation between the compartments.
Next was the moulding that goes below the windows. For installation it was rotated clockwise 90 degrees so that the flat surface on the bottom was facing the wall. It is beveled on the top to allow for the windows to open.
In this photo Don is installing a piece of this moulding.
Next were the trim boards that are below the windows. These fit against the above moulding and under a small lip on the moulding. Here Mike is holding a board while Bill K. is nailling.
This photo shows the relationship up close.
This is what it looks like when finished.
Craig has finished the seats and backs, and they are safely put away in a storage pod.
Work continued on the outside trim as well. Here Don is finishing off the the trim pieces on the end of the car.
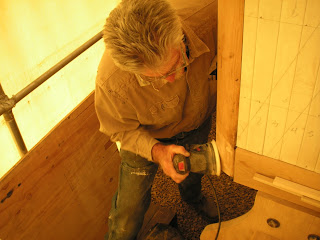
This photo shows Craig finishing off the lower part of the corner piece with a sander.
There are screws holding the corner piece on and wood plugs filling the screw holes. Now they have been sanded smooth.
The "underground crew," John and Bill L., continued work on installing the support angle brackets for the coupler pockets. This involved removing the nuts on the long bolts going through the inner sills. The brackets were previously marked and drilled and now being bolted in place. Here John is working from the pit below the car.
This photo shows Bill on the floor of the car keeping a bolt from rotating while John turns the nut below.
One bracket has been installed and John is bringing in another. As you can imagine they are quite heavy, and working space under the car is restricted.
They used a beam made from 2x4's to rest the brackets on while lining up the bracket to the bolts.
In this photo John is holding the bracket in place while Bill tightens the nuts.
This photo shows a bracket installed with nuts and lock nuts in place. There also is a straight edge extending across to the other inner sill on the left to mark the position of the bracket on that side.
Finally we extended the platform on the east end of the car with plywood so as to provide a better surface for a ladder to access to overhang above. The under side of the overhang needs to have the paint stripped which will happen on a warmer day. Here Don is securing the plywood to a 2x4 underneath.
In this photo Mike is reminding us where the edge of the platform is.


