Friends COS calendar

A subset of the Friends of the Cumbres and Toltec Scenic Railroad located in Colorado Springs, Colorado, with the mission of preservation, restoration, and interpretation of CTSRR historic assets. The Springs group is primarily involved in restoration. See below for blog archive of older postings.

Monday, December 13, 2010

East end buttoned up


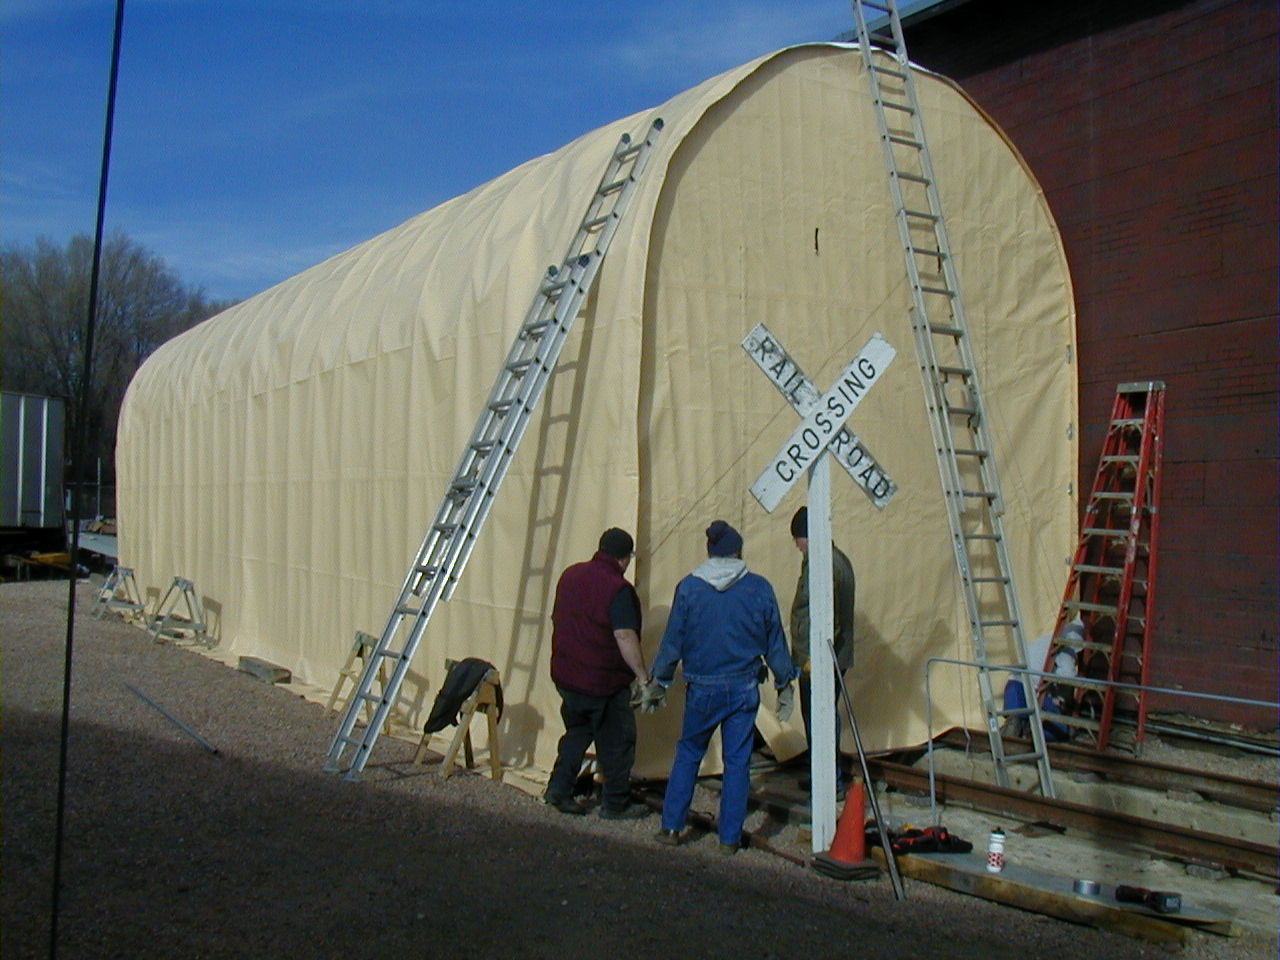
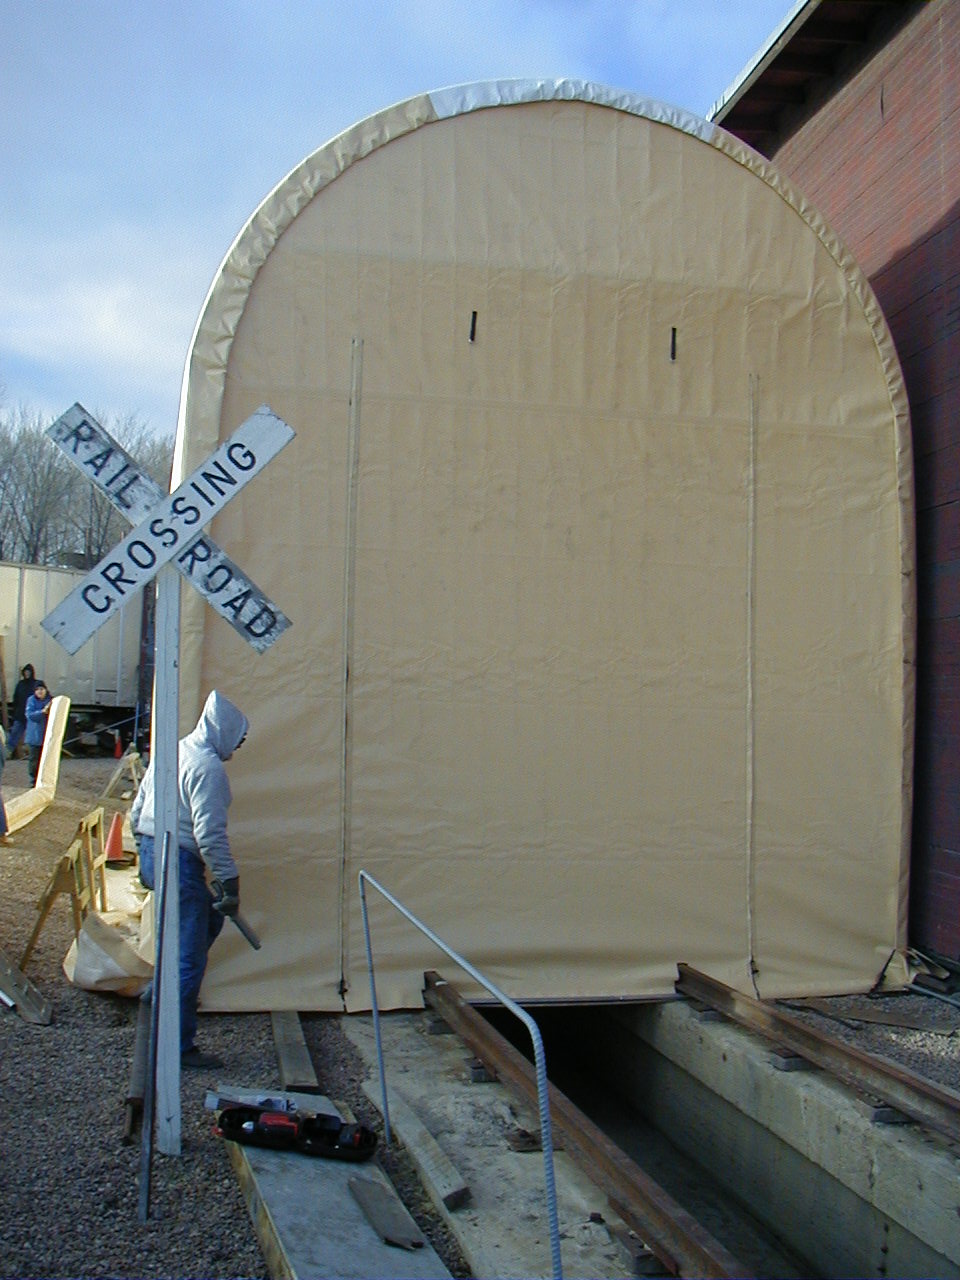
It was a cool, but fortunately not very windy day to begin enclosing the ends of the shelter over our project.  The east end was done first, by lifting the material up with ropes and ladders, as our rental compay is feeling the effects of the economy and unable to allow us to use the lift.  The material was quite stiff from the cold, but we were able to work it up and into place with patience and persistance.  At least as difficult was getting a good overlap of the top and side as it had shifted to the west and was hard to work with as well.  By pulling, pushing and poking it came along, and the end result is seen on the right, above.

 The ramp and boardwalk into the car on the west end required some modification as seen on the right.  The rail is in place where the bottom of the end piece will be, but time, lack of daylight, and cold suggested that this will be continued next time.  (Is that saw blade broken off?)

Friday, November 26, 2010

A Big Day 11-20-10

Today we are raising the shelter cover that was delivered a few days ago.  A great crew showed up to help from the local Friends, as well as some help from the Trolley folks.
 
After laying the cover out on the ground in accordion fashion, ropes were placed over the framing and attached to the cover.  A crew of many was placed on the other side to pull the cover up over the top of the frame.  One person was on the roof of the car to help with snags and keep things moving.

The process went quite smoothly.  At one point we had to pull at an angle to better center the cover on the frame.  Yours truly was on the end in the left photo above.  The bottom sides of the cover were then anchored to the rail on the ground with rachet straps.


A framing member was fastened at each end with blocks that will be used to raise and lower the end flaps for access and ventilation.  One end also has a three foot door for personnel access.


We took the opportunity to remove the rubber roof cover from the car, with the cover in place and all the help anxious to move on.  Below are photos showing the cover being rolled off (not easy because it was heavy, and glued down).  The roof is covered with metal that was soldered together, but now is rusted and coming loose.  The clerestory windows have been coverd with plywood.


Notice the wooden wedges that were placed to protect the vents on the roof.

Back to 470 (0252) 11-6-10

Today we started dismantling the ends of the car.  These are views of the east end before starting.  The photo on the right below shows a detail of the lower corner, with screw holes that have been countersunk and filled with well-fitting wood plugs.  These are present elsewhere as well, as in the panels above the tongue-in-groove covering most of the end of the car.
                               
Above are the "after" photos showing the framing at the car end.  Note the countersunk screw holes in the upper panels that were filled and painted over.  The number "9" is from a former life, but subsequent to service as a sleeper car.  The framing around the door is fairly complex.  Also reproducing the rounded trim will be a challenge.

Meanwhile, Tom has been crawling around in the pit contemplating the dollies that are planned for supporting the car during rebuilding.  There are no trucks available at this time for running on narrow gauge track.  It is hoped that eventually these can be obtained.

Thursday, November 25, 2010

OB Demo at TRAIN Convention 11-3-10

We were asked to do a demo of OB for the attendees at the Tourist Railway convention in Alamosa on November 3, 2010.  They rode the train from Alamosa arriving in Antonito in the morning, watched the piledriver in operation, rode the C&T narrow gauge, then took the standard gauge back to Alamosa.

On the left, above, the piles have been tapered for driving.  On the right, the locomotive and piledriver are in position for operation.  A pile was driven next to the track in Antonito to mark a future path to the CRF from the parking lot.

We are grateful for the locomotive crew for their help in providing steam and air for the operation.  Special plumbing was needed to attach the steam line of OB to the boiler of the locomotive.  Air was used to blow out the lines and the donkey engine in OB after completion of the operation, to prevent rust.

Please see the youtube link below for a video summary of the TRAIN convention visit.

Wednesday, November 24, 2010

Back to the sill 10-30-10

Today was devoted to continuing to isolate the deteriorated part of the sill.  The truss bar will have to be cut in about the location of the C-clamp on the left, above.  Before cutting, however, a come-along was placed with some traction to keep the floor from shifting.

On the left, above, the bar has been cut and dropped down about a foot. The next task will be to remove the nut rusted on the end.  In spite of plenty of WD-40 and effort, no movement occurred.

It was left to Bob and the torch to finish the job.  Everything went well.  We had plenty of water and a fire extinguisher on hand just in case.  The truss end was removed to free the sill, and will be welded together and replaced after repairs to the sill have been accomplished.


 Meanwhile, the electricians have been at work.  We have tapped into the electrical panel in the roundhouse and run an underground line to the wood shop.  The panel in the shop is shown in the photo on the right.  Lights and power for the tools should be forthcoming soon.

OB repairs 10-9-10

The decking under the hoist house of OB was deteriorating and was replaced this weekend.  It was replaced during the recent restoration, but was one of the first things done, over 10 years ago.  Also, the underside had not been treated properly.  The old decking had been removed prior to this weekend (right photo).  The new material was made from rough lumber, and had to be cut to lap together.

It was primed and painted on all sides before installation, and hopefully will last a long time.  Keeping OB in the CRF in Antonito also will help.

We have been asked to demonstrate OB at the Tourist Railway convention in November, and would like to have it ready to go in good shape.

Sill replacement 9-18-10

Today effort was devoted to isolating the sill on the corner of the car under the dripping icebox.  On the right the deterioration of the wood is evident.  Approximately the 6 or so feet of the wood on this end is unsound, and the decision was made to splice in a piece to replace the bad part.  The hardware had to be removed, but was rusted.


On the left, above, a truss rod is shown in the floor framing extending from the left into the opposite sill on the right of the photo.  The rod was cut and pulled out to the right.

The sill is mortised into the floor framing as well as the vertical framing for the wall, so it cannot be easily removed by dropping it down or pulling it to the outside. 

This end of the car is being braced in anticipation of cutting the sill at point where it is sound for removal.  The metal truss piece passing through the sill also will be cut.  Blocks were placed under the corner of the car on the concrete of the pit.  A post was also placed from the floor to the ceiling (kindly lent by the Trolley Museum) to keep the ceiling in place.

More next time.

Ceiling, etc. 8-21-10

The ceiling needs replacing, and removal was begun.  The lights were first removed from the center of the car and placed to the side. The tongue-and-groove was then taken down, along with years of dust, dirt, and soot, as well as a few old wasps nests.  There are storage cabinets at each end of the car over the doors, and the frames of these are in good shape.  Craig made new doors and cleaned up the old hardware, and these have been set aside for later.

The vertical posts in the corner of the car where the old icebox had been built when it was a maintenance-of-way car needed replacing, and Craig has begun to fabricate new ones.  There is considerable deterioration in this area, including in the sill under the icebox where water accumulated.  More on that later.

Steel reinforcing

 
 We have been asked to show some of the steel reinforcing in the Pullman sleeper.  I was using a different camera to take these photos and formatting is more difficult.  Please click on the images to enlarge them if necessary.  Above left shows a steel truss spanning the length of the car that is anchored through the sills at each end of the car.  There are vertical brace plates set on the sills at the bends of the trusses, with grooves at the tops to receive the trusses.


On the right the truss is rounded and threaded, and passes through the sill and is anchored with a plate, a nut, and a washer. 
Truss rods also extend through the framing at intervals through the car, both vertically and horizontally.  The horizontal rods (not shown) pass through the floor framing, and are fixed at each end to the sills.  The vertical rods pass throught wall framing between the windows and are anchored at both ends.  There also is a short vertical rod fixing the structural framing to the sills, on the left in the lower right image.

Wednesday, July 21, 2010

A Hot Day - July 17, 2010

Today I started removing siding on the south (sunny) side of the car.  The temperature was predicted to be around 90F, so we began at 7AM.  There is blocking at both ends of the car on both sides, with these blocks placed between the framing members to provide rigidity.  The blocks are of different sizes depending on the space available within the framing.  They were not nailed or fixed in place, but held in place by the siding and interior finish.  Many of these are warped, and it is our plan to replace them with plywood which will provide even more rigidity.
Inside the car, John continues with removal of the exterior sheathing below the car.  This was not a delicate operation, but the end result on the right looks good.  The concrete pit below the car is visible through the framing.  The plywood and masonite sheets will help keep us above it all.

In summary, we have made a lot of progress in early July.  We have another work session on the 31st that I will not be able to attend, but I will try to do more timely updates in August.  In the near term, plans are for completing the structure, and doing an assessment of what will be needed for commencing reconstruction of the car.  Plans also call for raising the car and placing dollies underneath.

A peek at the roof, July 5-9.


We rolled back the rubber roof covering installed several years ago when the car was "mothballed" to see what condition things were.  It is a metal roof with solder?/caulk between the panels.  The chimney for the heating stove (not original) can be seen behind the ladder.  On the right, above, Duncan and Craig are surveying the clerestory windows from the outside.


On the left, above, a closer look at the framing of the clerestories.  There are Roman numerals on each post in sequence.  Were they fabricated  off the car and then installed in the appropriate place?  On the right, a closer look at the roof.  Some rust is evident, but the rubber cover kept everything stable during storage.

On to the car, July 5-9.


The crew is attacking the floor (Mary Jane, Rosemary, and Marshall).  Rosemary weilds a mean crowbar.  It must be from all that practice driving a schoolbus.  There are (were) floorboards, two layers, on the framing, as well as sheeting on the underside of the car over the framing as well.

On the underlayed floor below the finish flooring, there was this plaque inset at one end of the car.  It has the letters "D&RGRR", and the date, 1887.  We believe that this car was built in 1889, and it may be that a number of plaques were cast prior to construction of this series of cars (my speculation).

On the left, most of the flooring has been removed.  Temporary sheets of masonite are in place on the far end.  On the near end, the underside exterior remains in place, and the shavings placed for insulation can be seen.  This was removed for later replacement.  The exterior on the left side has been mostly removed, while the right (sunny) side remains.  Note the storage locker over the door on the far side of the car.  These are present at both ends.  Below are photos of one of the lockers with the facing nicely cleaned up and sanded.  Also, Craig has made new doors, but cleaned up and reused the old brass hardware.


That's it for the interior for now.

Followers

Blog Archive