Friends COS calendar

A subset of the Friends of the Cumbres and Toltec Scenic Railroad located in Colorado Springs, Colorado, with the mission of preservation, restoration, and interpretation of CTSRR historic assets. The Springs group is primarily involved in restoration. See below for blog archive of older postings.

Wednesday, January 23, 2013

Welding - January 19, 2013


This Saturday was welding day for the steel running the length of the car.  It was a "January thaw" day which made for very good conditions.

We missed Craig for this work session, and we wish him a speedy recovery.

In the photo on the right the tie rods have been pulled back to the left (north) in order to bring the steel on the right out of the car to weld.  We had a water hose handy as well as fire extinguishers, hopefully not to be used.


We brought the steel piece out of the door of the car, over the end sill and supported it on a sawhorse.  The tent flap was lowered to keep the wind at a minimum so as to not interfere with the welding gas.


All contacts of the splice piece with the larger pieces were solidly welded.  For all of us except the welder it was a hurry-up-and-wait day.  We worked to move the tie rods, then get the steel out for access.  During the welding we caught our breath.


Now the welded piece (truly one piece now) is back in place, and the tie rods have been moved to the right to free up the north steel.  The jacks were used to take pressure off of the tie rods in order to slide easier.


We slid this piece under the end sill and welded in this position.
Fortunately we had a good crew for the moving.


Here is a good look at the end result.  The welds were ground smooth along the edges.  The bolts will remain in place and be torqued.  We moved the steel back into the car and called it a day, saving repositioning the tie rods yet again for another day.

Monday, January 7, 2013

Sills drilled - 1-5-2013

Bob and I continued with drilling in the south inner sill for the pipes which will act as struts between the steel that will be placed against the outer aspect of the sills.  Please see the previous post for a better look at Lenny's right angle drill.
Meanwhile, Craig was cutting pipe for the struts.  Tom had set up a jig for the proper length previously, but due to a prior commitment Tom was not able to participate today.  (Hope you are healing quickly, Tom!)  After cutting, the edges were rounded to remove the burrs.

Thanks to Glenn for taking these pictures.
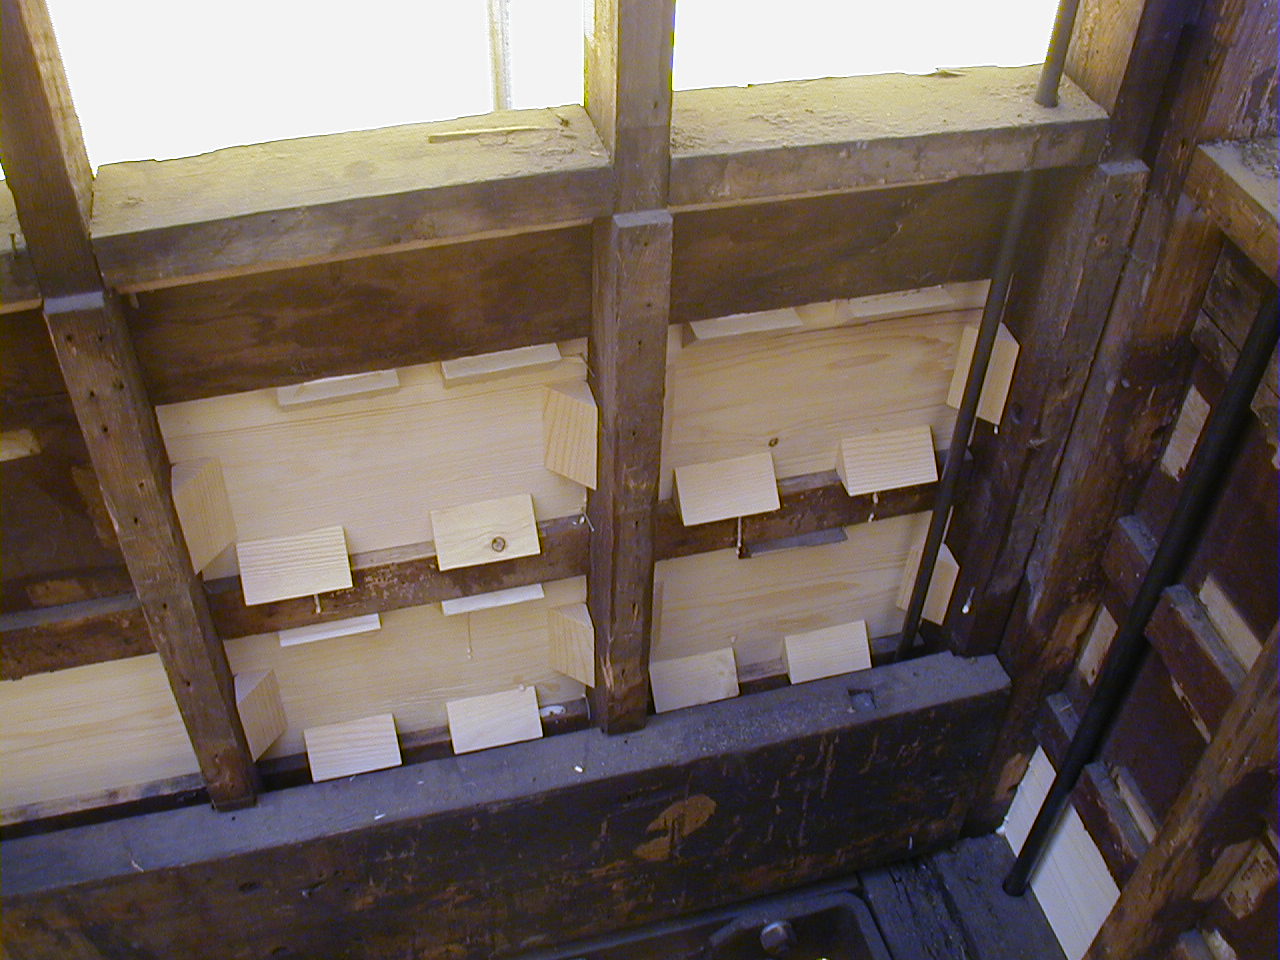
This photo shows a pipe strut passing through one sill, with the far end at the hole in the other sill.  Note the blocks at the top of the photo which are mortised into the sill acting as spacers.
This photo shows the pipes in place.  The inner sill on the right was replaced at some time prior to our acquiring the car, probably due to breakage, and no spacer blocks were mortised into it at that time.  The splice into the original part of the sill is present just beyond where the orange cord crossed the two sills.  (Clicking on the pictures will enlarge them.)
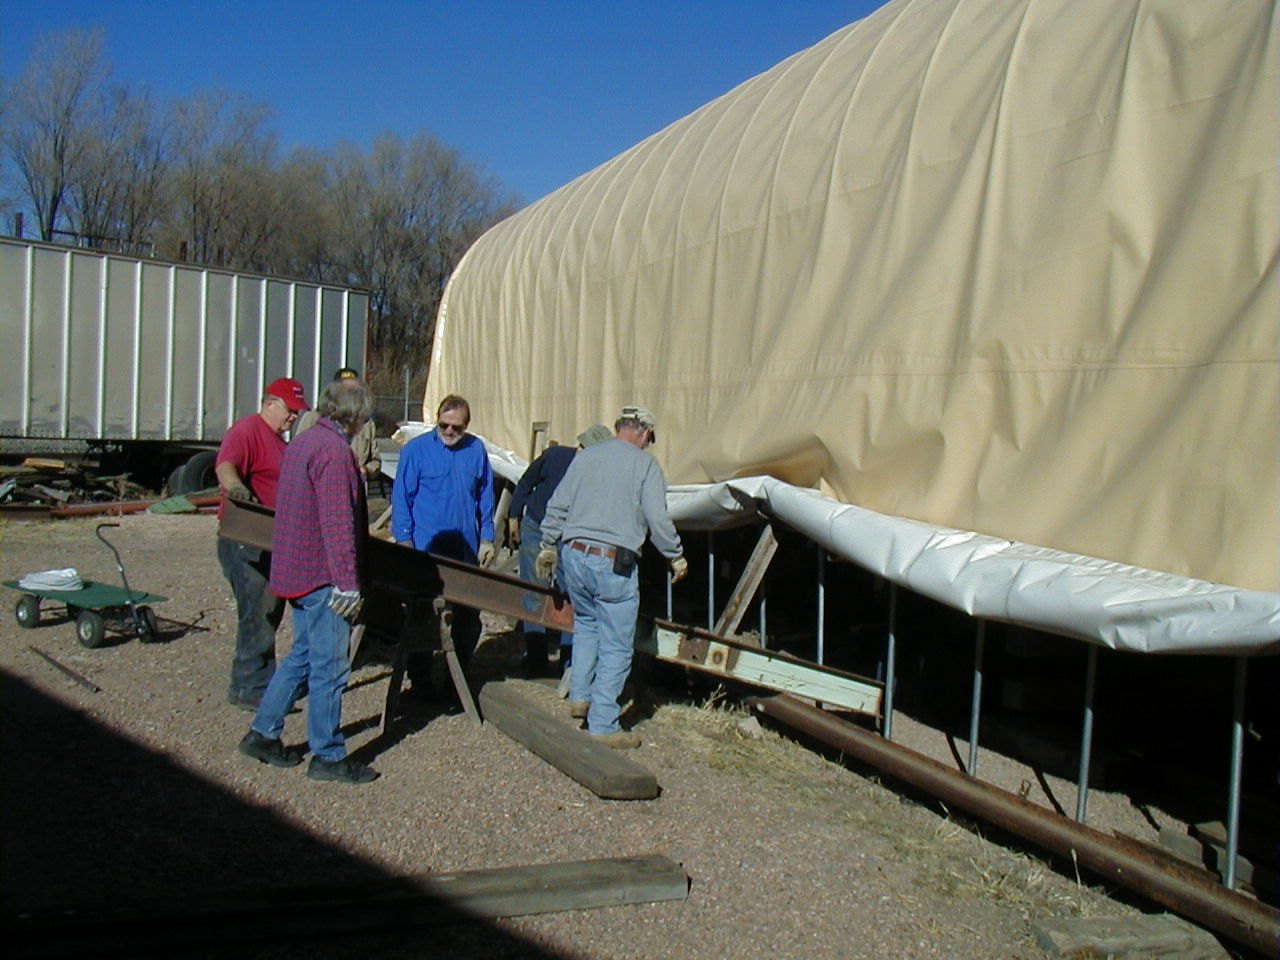
Craig has made new blocks to install where that sill replacement was done.  He is holding one, and there is a stack on the step behind him.  He and John are discussing dimensions.


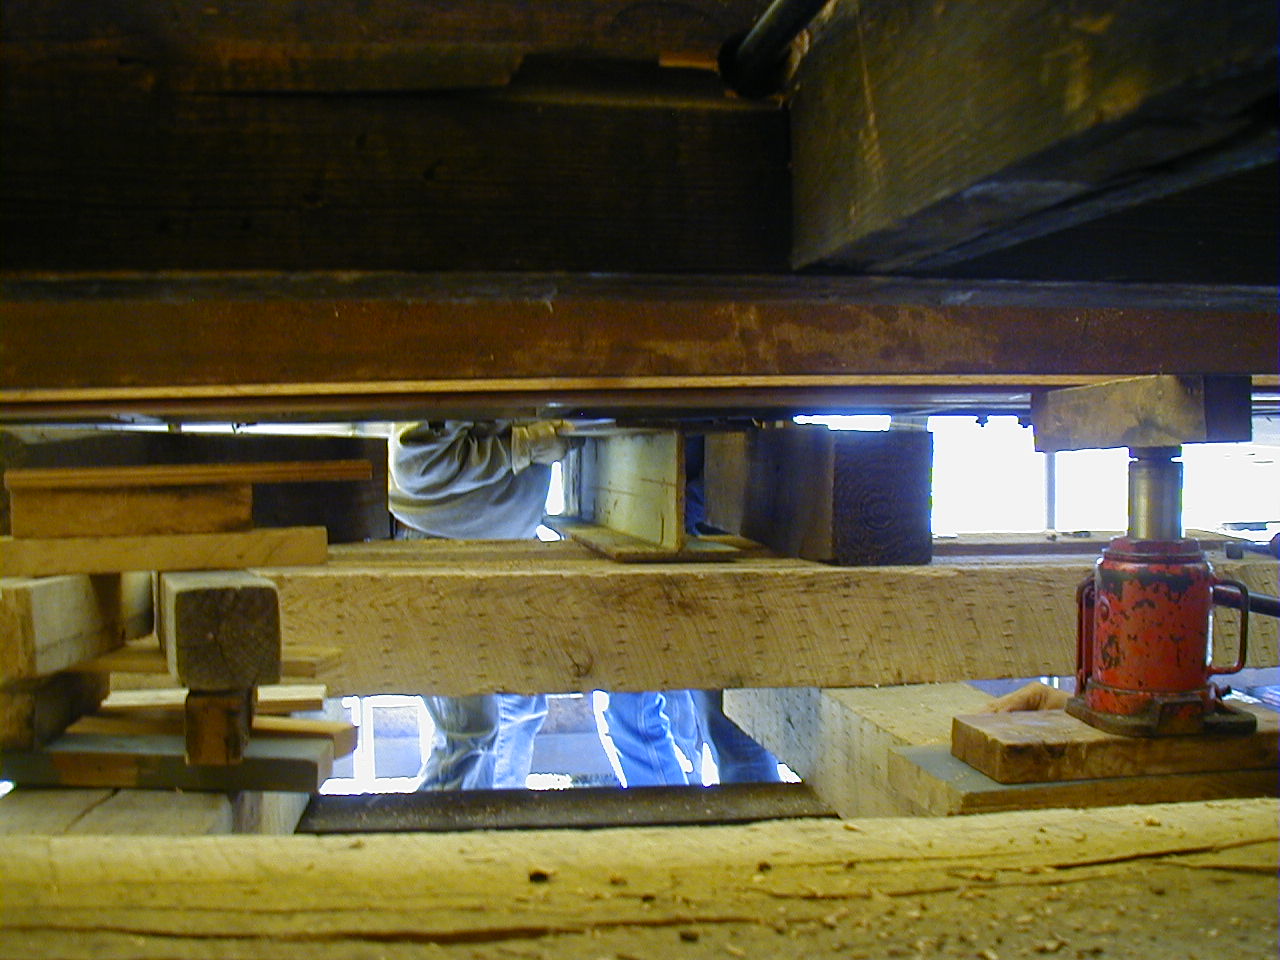
New mortises had to be drilled and chiseled out of the replaced part of the sill for the new blocks.  It is much harder wood than the original as we found out when we were drilling as well.  A new block can be seen in place near John's right shoulder.

We should be about ready to weld the steel pieces at the splices, then bolt everything together.

Thursday, January 3, 2013

Short day - 12-15-12

We just worked a half day today because of Tom's Christmas party.  It was an extravaganza as usual, as he and Hilde go all out for it each year.

The project for the day was to continue drilling larger holes in the two inner sills for the pipes to pass through containing the bolts fixing the steel on each sill together.
 Lenny has a robust angle drill that will fit between the sills, and he and Craig built a guide for holding the drill in position.  However, sometimes the most elegant solution is not the most practical.
The final solution was to hold the drill and use a Forstner bit.  Lenny worked from above and I helped stabilize from below.  We finished the holes in the north sill so we tackle the south side next time.
Meanwhile, John was marking places in the south sill at the west end for  morticing for the blocks to be placed.  An original one is present in the foreground of the photo.

Thursday, December 6, 2012

Multi-tasking - 12-1-12

One of the tasks today was to replace the stabilizing blocks in the frame of 470.  Many of them were servicable and were left in place, but many had to be removed.  Craig obtained the lumber and planed it to the proper thicknes to fit in the grooves of the framing.  In this photo John and Craig are discussing the process.  Craig brought his nail gun which he is holding that sped up the process.


John kindly took a picture of me sanding the frames prior to glueing the blocks in place.  There was some residual of the hide glue used initially that was removed, as well as roughing the surface for better adhesion.  The grooves for the blocks can be faintly seen in the vertical member of the framing to my left.


In this photo, Bob is cutting the blocks to fit.  There was some variation in size of the openings, as well as shape where the angled braces are located.


The blocks were both nailed and glued in place, with glue placed around the periphery as on the small triangular blocks stacked below.


This photo (taken by John) shows the blocks in place from the inside of the car.  Originally they were only glued, not nailed.


Meanwhile Lenny, John, Tom, and Glenn were involved with steel issues, preparing for securing the steel pieces to the inner sills.  Here Lenny is doing some measuring near the splice in one of the inner sills.


Tom S. has been busy fabricating a prototype assembly for fastening the inner sills together.  John and Glenn are evaluating the device, and it looks like Tom is on the right track.  The bolts are 3/4 X 18-1/4 heavy hex bolts inside schedule 80 pipe which should secure the sills together.

I-beams - 11-17-12

 Today we continued with levelling and straightening the car.  We placed I-beams under the frame at about where the bolsters (trucks) will be as a base.  This meant rolling up one side of the structure as shown in the photo.  Fortunately we had a good crew to lift, and we have one end on a sawhorse in this photo.
In the second photo, the beam is levelled and we are starting to slide it over the ties and under the car frame.  Thanks to Regis from the Trolley Museum who was cheering us on, we have some photos while I was helping lift and shove.
Here John and I are helping to slide the beam in from inside the tent.  We have help on the other side of the car.

This is the view from below.  The beam rests on the ties that have been blocked up from the rails installed initially, and jacks were used to make room for the beams.

Tom is manning one of the jacks at the end of the car.  The ends tended to droop due to the flexibility of the frame, and had to be levelled.

Here is the same thing from the other side with John M. and Tom F.supervising.

Monday, November 12, 2012

Same drill 11-3-2012

Drilling continued in the steel for the north inner sill.  Lenny is doing the honors with the piece in situ, using the drill in the horizontal position, while Bob is providing the lubricant.  The splice piece had already been drilled, but not the long pieces.
Both inner sills have now been fitted with the reinforcing steel.  They will eventually be bolted together with pipe spacers between for added stabilization.  The tie rods passing through the sills will be tensioned later as well.
Meanwhile, Craig is fitting the corner post for the west door that he has fabricated.  The steps into the car were also reinstalled at this end so we don't have to walk to the other end, often ducking extended tie rods, to access the car.

Friday, November 2, 2012

South sill steel fitted 10-20-2012

We started by marking the holes to be drilled for the splice in the two long pieces of steel on the south inner sill.  They were then removed from the sill and lined up for drilling and bolting the splice in place.  Not shown, but taking significant time was the process of moving the tie rods that were passing through the lower sills and the steel, from side to side in order to remove the steel beams.

The magnetic drill was again  used to drill the holes for bolting the splice piece to the larger pieces.  John M. is doing the honors while John E. and Tom are advising.  Craig in the background can't stay away from the wood.
One side is together and the other is ready to bolted.  It has been decided to bolt and weld the steel together after consulting engineers on the best way to do it.  On a prior post I had suggested that bolts alone were going to be used, but they will be welded as well.

The steel that now runs the length of the car weighs over twice as much as the two pieces before joining, so it took a come-along and some coaxing to get it back in place.  Craig is drilling holes to accommodate the heads of the bolts in the sill after the steel is in place.  Finally it all fits together.

With the steel removed, the sills are sagging as well as shifted side to side as in the photo on the left.  After clamping the steel in place on the south inner sill, the alignment is much improved as in the photo on the right.  Note the splice in the sill (done in the past) near the end of the steel on the left is aligned much better on the right.

Followers

Blog Archive