Friends COS calendar

A subset of the Friends of the Cumbres and Toltec Scenic Railroad located in Colorado Springs, Colorado, with the mission of preservation, restoration, and interpretation of CTSRR historic assets. The Springs group is primarily involved in restoration. See below for blog archive of older postings.

Wednesday, August 14, 2013

Wood work - 4-20 & 5-4-2013

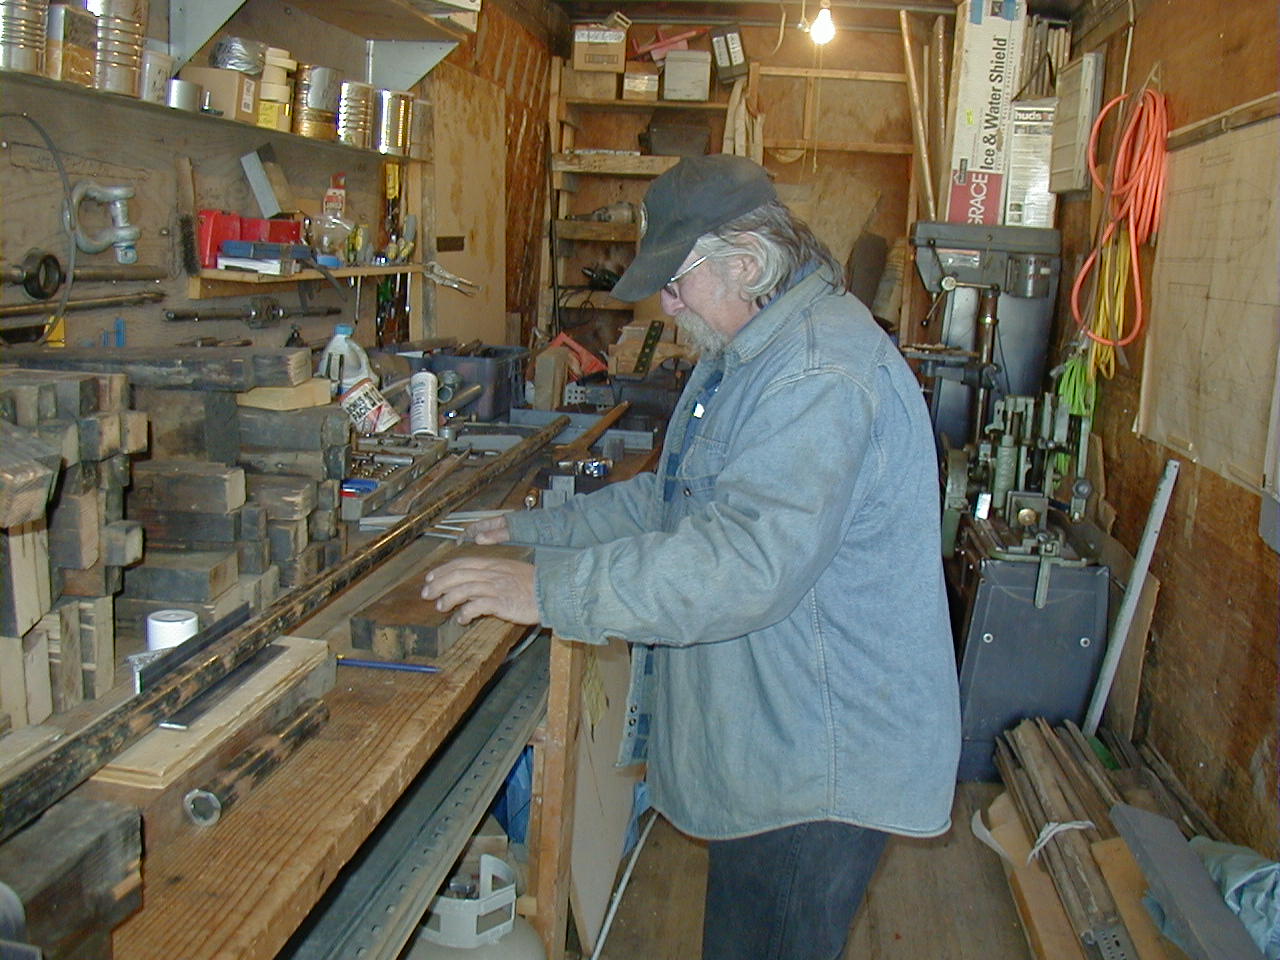
Prior to the work session on 4-20, Craig 
fabricated replacement sill extensions for 
the end platforms using the ones we had
removed as patterns. The first photo shows 
his shop where he has glued the pieces for 
lamination together.
The second photo shows the finished extensions at the work site ready for installation.


Work continued on fitting the brackets for the cross braces.  Dale is doing some trimming on one of the braces.
Craig continues to fill and sand the corner posts as shown in the next photo.  Some are being reused, while others needed replacement.
One of the fascia pieces is being installed in this photo.  Some of the new window framing is also visible.

Thanks to Craig and Glenn for taking these photos in my absence.

Tuesday, August 13, 2013

Replacing I-beam, 3-30-2013

 It was discovered that the floor was uneven at the east end of the car due to the I-beam supporting that area not being straight.  The beam was replaced by jacking up the car as shown in the the first picture.  The beam to be removed is behind the jack.
A chain was secured to the beam, and a cable puller (anchored to Lenny's truck) was fastened to the chain.  The beam was then slid out from under the car on to saw horses as shown in the next photo.


Fortunately we had a good crew this day.  I believe it can be seen that the right end of the beam is sagging a bit from a prior repair.


The last photo shows the new straight beam in place.  It is a bit short to support the outer sills, so a piece of angle steel was inserted on it as shown.  The sills appear much straighter now.

Thursday, August 1, 2013

Installing cross-brace brackets - 3/28-4/6/2013

With the angle steel pieces in place along the inner sills, the cross braces abutting the steel must be stabilized.  Brackets have been fabricated (see Feb 2nd posting) to accomplish this.

In the first photo a bracket has been set in place on the cross brace on the left.


The second photo shows a view from below.  You may recall that originally the braces were mortised into the sill, but the tenons had to be cut to place the steel.


The third photo shows the cutout for the truss rod that is adjacent to the brace.  The finish had to be removed from the angle piece prior to welding.


The welding was done from below as shown in these two photos.   Precautions were observed with water hoses and fire extinguishers immediately available.  No untoward events occurred.
The end result is shown in these two photos.  Following welding, bolts were placed through the brackets fixing the end of the brace securely in place.

Thanks to Tom and Glenn for taking photos in my absence.

Thursday, March 7, 2013

Ditto - March 2,2013


We continued fitting the bolts through the steel  angles and the inner sills, and were able to get things lined up without further drilling (or re-drilling) of the holes in the sills.  Nuts were placed on most of the bolts.  There are two bolts that were short that went through the splices, that will have to be ordered.  Everything seems to be nice and straight, and like Bob said, it is like walking on a sidewalk now.  Next will be fitting the blocks and brackets between the inner and intermediate sills.  These likely will have to be individually cut and fitted.
Meanwhile John continued work on the pattern for the steel pieces that go over the doorways on each end.  There will be essentially a "cage" of steel at each end of the car to provide rigidity as well as the steel running the length of the car.

Two men from the company that we have been negotiating with to fabricate the steel visited the site to better understand out plans, and are interested in participating in the project.

Sunday, February 24, 2013

Getting it together - Feb. 16, 2013


Initially, we replaced the pivot blocks on both ends of the car that Craig had made previously.  We then pulled the angle steel pieces together against the inner sills in preparation for beginning to install the long bolts through the steel, sills and pipes.  That involved alignment of several holes drilled in wood and steel, and I might just say that we have a little more drilling to do.
                  
Some of the bolts were passed through without difficulty (in the far lower right and upper center of this picture), but others need re-aligning of the holes.  Once these are in place the angle steel pieces can be drawn tight against each other with the pipes acting as spacers through the sills.


Meanwhile John and Glenn were making a pattern of the piece of wood that was over the doors at each end of the car in preparation for fabricating pieces of steel that will be inserted over the doors as part of the reinforcing at the car ends.  Note that the curve at the top is a complex one, with a cutout in the center for the top of the door.  This is being done on a piece of Masonite.

During the last two weeks Lenny has located a company that can do steel fabrication, and has offered to do the brackets for the inter-sill blocks (see previous post for photos) at a reasonable price.  They seem interested in our project and hopefully can be helpful as we continue to reinforce the car to be up to current standards for rail use.

We were pleased to have Craig join us for lunch today, and thank Maggie for bringing him to the work site.

Sunday, February 3, 2013

Metal shop Feb. 2. 2013

We started the day replacing the tie rods through the north piece of angle steel, on the left, and bringing them out through the outer sill.  We then positioned the wooden blocks between the inner sills so that the mortises fit into the tenons and began to clamp the inner sills together.  Dale and John M. are working to get everything to fit.


Most of the original blocks could be reused, but some new ones had to be fabricated as well.  The two angle steels are in position ready to be moved toward the center against the wooden inner sills and bolted together with long bolts passing through the black pipes.  One of the pipes is seen just above the clamp in the photo.  The pipes butt against the steel to maintain proper distance between them.


A "speedbump" was encountered, however,  We could not begin to bolt the steel together because the body-bolster truss-blocks have not yet been replaced, and as can be seen here they are not in good condition.  The blocks are in the process of being fabricated.


So, on to other things.  The plywood used for temporary flooring was removed, and the blocks between the outer and intermediate sills were repositioned as needed.  Washers and lock nuts were placed on all the horizontal tie rods but not tensioned as yet.


Meanwhile, Lenny was fabricating brackets for the blocks between the intermediate and inner sills.  The tenons had been cut at the inner ends to remove the blocks to accommodate the angle steel.  The brackets will be welded to the angle and will support the blocks against it.


The brackets were made from angle steel, and cut and bent as shown in this photo.  Tom S. did the design and started fabricating them before he met up with a knife.  The tenons were preserved on the outer end as can be seen on the block below.


Bob (right) and Dale started working on cutting grooves in the framing to accommodate more steel framing that will be placed into the ends of the car.  More on this later.


Wednesday, January 23, 2013

Welding - January 19, 2013


This Saturday was welding day for the steel running the length of the car.  It was a "January thaw" day which made for very good conditions.

We missed Craig for this work session, and we wish him a speedy recovery.

In the photo on the right the tie rods have been pulled back to the left (north) in order to bring the steel on the right out of the car to weld.  We had a water hose handy as well as fire extinguishers, hopefully not to be used.


We brought the steel piece out of the door of the car, over the end sill and supported it on a sawhorse.  The tent flap was lowered to keep the wind at a minimum so as to not interfere with the welding gas.


All contacts of the splice piece with the larger pieces were solidly welded.  For all of us except the welder it was a hurry-up-and-wait day.  We worked to move the tie rods, then get the steel out for access.  During the welding we caught our breath.


Now the welded piece (truly one piece now) is back in place, and the tie rods have been moved to the right to free up the north steel.  The jacks were used to take pressure off of the tie rods in order to slide easier.


We slid this piece under the end sill and welded in this position.
Fortunately we had a good crew for the moving.


Here is a good look at the end result.  The welds were ground smooth along the edges.  The bolts will remain in place and be torqued.  We moved the steel back into the car and called it a day, saving repositioning the tie rods yet again for another day.

Followers

Blog Archive