Friends COS calendar

A subset of the Friends of the Cumbres and Toltec Scenic Railroad located in Colorado Springs, Colorado, with the mission of preservation, restoration, and interpretation of CTSRR historic assets. The Springs group is primarily involved in restoration. See below for blog archive of older postings.

Wednesday, January 27, 2016

December 2015

December saw work continuing on the end platform tie rods as well as installing trim on the roof.

There are several tie rods in each platform, and in this photo Bob and Bill L. are reviewing a photo of the configuration taken prior to dismantling of the platform.


This photo taken in January 2011 shows two rods next to the (near) inner sill and one along the inside of the (far) outer sill.  It is apparent that the rods were bent and did not extend straight through.


Bill and John are pulling a rod through holes that have been drilled in the wood and steel.  Note the steel on the end sill of the car not present previously.


Bob was in the pit under the car pushing, twisting, and pounding the rod through.  Some bending was needed to get through the holes as mentioned in the previous post.


Meanwhile Craig was fitting trim pieces on the roof.  A little chisel work was needed to make it right.


And on it goes.


Don and Debbie were working on the upper sashes of the windows putting pegs in the frames.


Finally Santa stopped by for a visit and Debbie welcomed him to our project.  Hopefully she got to give him her Christmas list.


Goodbye, Santa.  Have a good trip!


Thanks to Tom for some of these photos.

Tuesday, January 26, 2016

November 2015

In November we continued working on the roof, underside, and platform tie rods.

Don and Jim are installing the finishing pieces on the soffit.  Access was an issue but working from the inside of the car seemed easiest.


Not a lot of room to maneuver through the windows but it worked.


Looks good, guys.


Tie rods extend  from the underside of the car out through the platform framing and are threaded at the end of the platform to hold the framing in place.  Here Bill K. is drilling for one of the rods.  Another hole can be seen at the right edge of the photo.


In this photo Bill K. has gone below to push and pound the rod through while Bill L. and John help direct the end.


A little bending was necessary to make it through all the holes in the wood and steel.  The hook on the end to the left in the photo hooks on to the bolster.


The rod is in place but needs to be cut where John is pointing and then threaded.  A hole will be drilled in the end sill that Bill's left hand is resting on and the rod will be passed through that hole and a nut and washer installed.


Finally, two photos showing the bolster and needle beams bolted in place.  Here the top and bottom plates of the bolster are shown with an oak wedge between them at the end for rigidity.


This photo shows one of the two needle beams bolted in place.  More bolts will be added at the ends.

Monday, January 4, 2016

October 2015

This work session took place on October 31st and the weather was still mild.  Work continued on the bolster bottom plates, window trim, and the roof.

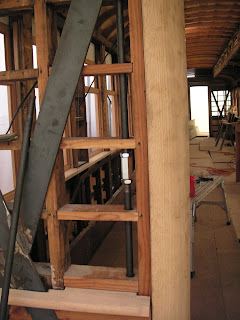
Craig has been installing the window sills as shown here.  They are notched and fitted around the posts which are located between the pairs of seats that will be facing each other.  The window frames are in place as well.


Between the seat backs (which face in opposite directions) there is a wider separation as shown here for some added privacy(?) between berths.


Plastic sheeting was placed over the window sills to keep the wood clean before sealing.  Here Debbie is cutting a sheet to fit.


The other bottom plate, I believe at the east end, was installed.  The platform sills had to be notched for it to fit, and Bob is doing this with the reciprocating saw (defying gravity again).  The sill close to the viewer has already been cut.


Now the plate can be lifted into place,  It was placed on blocks and rocked up alternately on one side and then the other.  Blocks were placed under it as each end was elevated.


Finally one end is in place and Tom is placing a nut on the bolt to secure it.


Work continued on the roof. After installing the bendy plywood and applying filler, the roof was sanded.  Good reach there, Craig.  A dusty job, however.


It is looking good - smooooth!


Tom and John are inspecting the roof (I guess).


Finally, coffee break.

Thursday, December 31, 2015

September 2015

September saw progress in several areas, the roof, vertical tie rods on the ends of the car, needle beams and bolsters, and window frames.

The tie rods had to be cut and threaded in order to install as space is limited above and below the car.  This photo shows a coupler joining the pieces together after installation.
In this photo a nut is being placed on the upper end of a rod which is passing through the horizontal beam above the door.


Here Ron is placing a nut and washer on the lower end of a rod.  (I wasn't kidding about the limited space.)


The bottom plates for the bolsters were installed.  This photo shows the plate resting on blocks below the bolster which is at the top of the photo.  It will bolt to the end of the bolster and provide support to the sides of the car.  The pin for the trucks goes through the center of this plate, so it essentially supports half the weight of the car.


This photo shows the bottom plate against the (somewhat rusty) bolster with bolts in place but not yet secured.  The end of the bottom plate is against the truss rod bracket.


Meanwhile Jim and Craig  continued to work on the roof.  The curves on the ends of the car are complex and required considerable fitting.  Here they are installing a piece of "bendy" plywood.


To refresh our memories, here is a drawing of the support mechanism under the car.  The bolsters are near the ends of the car, and the needle beams are on either side of the center running across the width of the car and seen on end in the drawing.  The queen posts abut the needle beams and act as spacers between the tie rods and needle beams.  This provides support to the center of the car.  (Click on image to enlarge.)

Here Ron and Bill are preparing to raise the needle beam into position using an ingenious and one-of-a-kind mechanism to accomplish this.  The beam is surprisingly heavy, not your average 4x4.


Success!  Now to bolt it into place.


These are the bolt holes for the needle beam on one side of the car.  They look innocent enough, but much of the framing had to be removed from the side of the car to expose them.


Like so.


Work continued on the interior of the car as well.  Here Tom is working on the clerestory frames, pulling old nails, I believe.


Craig continues with the trim here on the end of the car as well as inside along the bottom of the windows.  (See previous post.)

Thursday, October 1, 2015

August 2015

This month saw work continuing on the roof, mostly on the curved ends of the car, as well as working on the truss rod assembly under the car.

The finishing touches were put on the clerestory roof with the installation of the fascia that Craig had milled.  Bob is putting in the last fastener.  The windows will go in below and inside the fascia.  The frames have been made but not installed.


This photo shows the framing at one of the corners of the roof.  Note the curves in two directions in the lower area.  Covering this neatly was somewhat of a challenge.


The solution is "bendy" plywood.  Sheets of this material were cut into strips and  fastened onto the framing at right angles to the framing.  A second layer was added in the same orientation but offset a half strip width for increased strength.


c
This photo shows the process.  As Craig says "You can't have too many clamps."

This photo shows the strips in place.  Filler was applied over the surface and sanded smooth to complete the job.The side of the clerestory also has been covered.
Meanwhile Craig was working on the inside of the car, installing the window sills and trim between the windows.  Oh to be left handed.


Here is the finished product.  Nice work, Craig.  We will get a better look at the panel between the windows later.


Work began on installing the needle beams.  They support the queen posts which extend down to the truss rods and provide support for the body of the car.  One of the two needle beams is shown on the ground here.  In the upper part of the picture just to the right of center are two bolts exposed to which the beam will be fastened.


Here is another look at the bolts for the needle beam that can be seen exposed at the bottom of the picture.  The heads of the bolts are behind the two 2x6's that abut each other, and outside the large 2" board that runs the length of the car inside the framing.  And yes, they both turn easily with no access to the heads.


So Ron and Bill L. are beginning to remove the rusty screws that haven't been touched for 126 years so as to remove the boards to gain access to the heads of the bolts.  Where is the impact screwdriver guys?
Earlier in August Ron and Bill K. were drilling bolt holes in the spacers that go between the truss rod bracket and the bolster.  Most of the steel came undrilled and was drilled on site to fit the holes already present.

Followers

Blog Archive