Friends COS calendar

A subset of the Friends of the Cumbres and Toltec Scenic Railroad located in Colorado Springs, Colorado, with the mission of preservation, restoration, and interpretation of CTSRR historic assets. The Springs group is primarily involved in restoration. See below for blog archive of older postings.

Saturday, February 16, 2019

November-December 2018

Late fall saw work continuing on the coupler pocket and seat frames, and starting on the flooring and end platform railings.

The seat frames are cast iron and will need some cleaning up of burrs and ridges as well as removal of the legs for the outside frames along the wall.   Craig, Tom, and Dean are planning course of action.


Craig points out a ridge in the frame and there is a grinder that will be used to clean it up.


Sometimes a bigger grinder is needed.  It works best with two people, one holding and one grinding.  Here Don is grinding and John holding.


We began fitting the end platform railings and posts.  This photo shows the railings that Joe has made.


These are the posts for the railings.  They also were made by Joe and are threaded at each end and slightly tapered.


The car originally had roof vents for the oil lamps and for the restrooms.  This is a photo of a photo of a few of the vents that were present originally over one of the restroom areas.


We have diagrams of the restroom (or "saloon") layouts as shown here for the men.  From this the location of the roof vents was calculated.


First measurements were made on the floor to locate the fixtures in the restroom.


The floor locations were used to determine where the vents should be located, in the process avoiding roof framing, etc.  Here Don and Craig are carefully measuring.


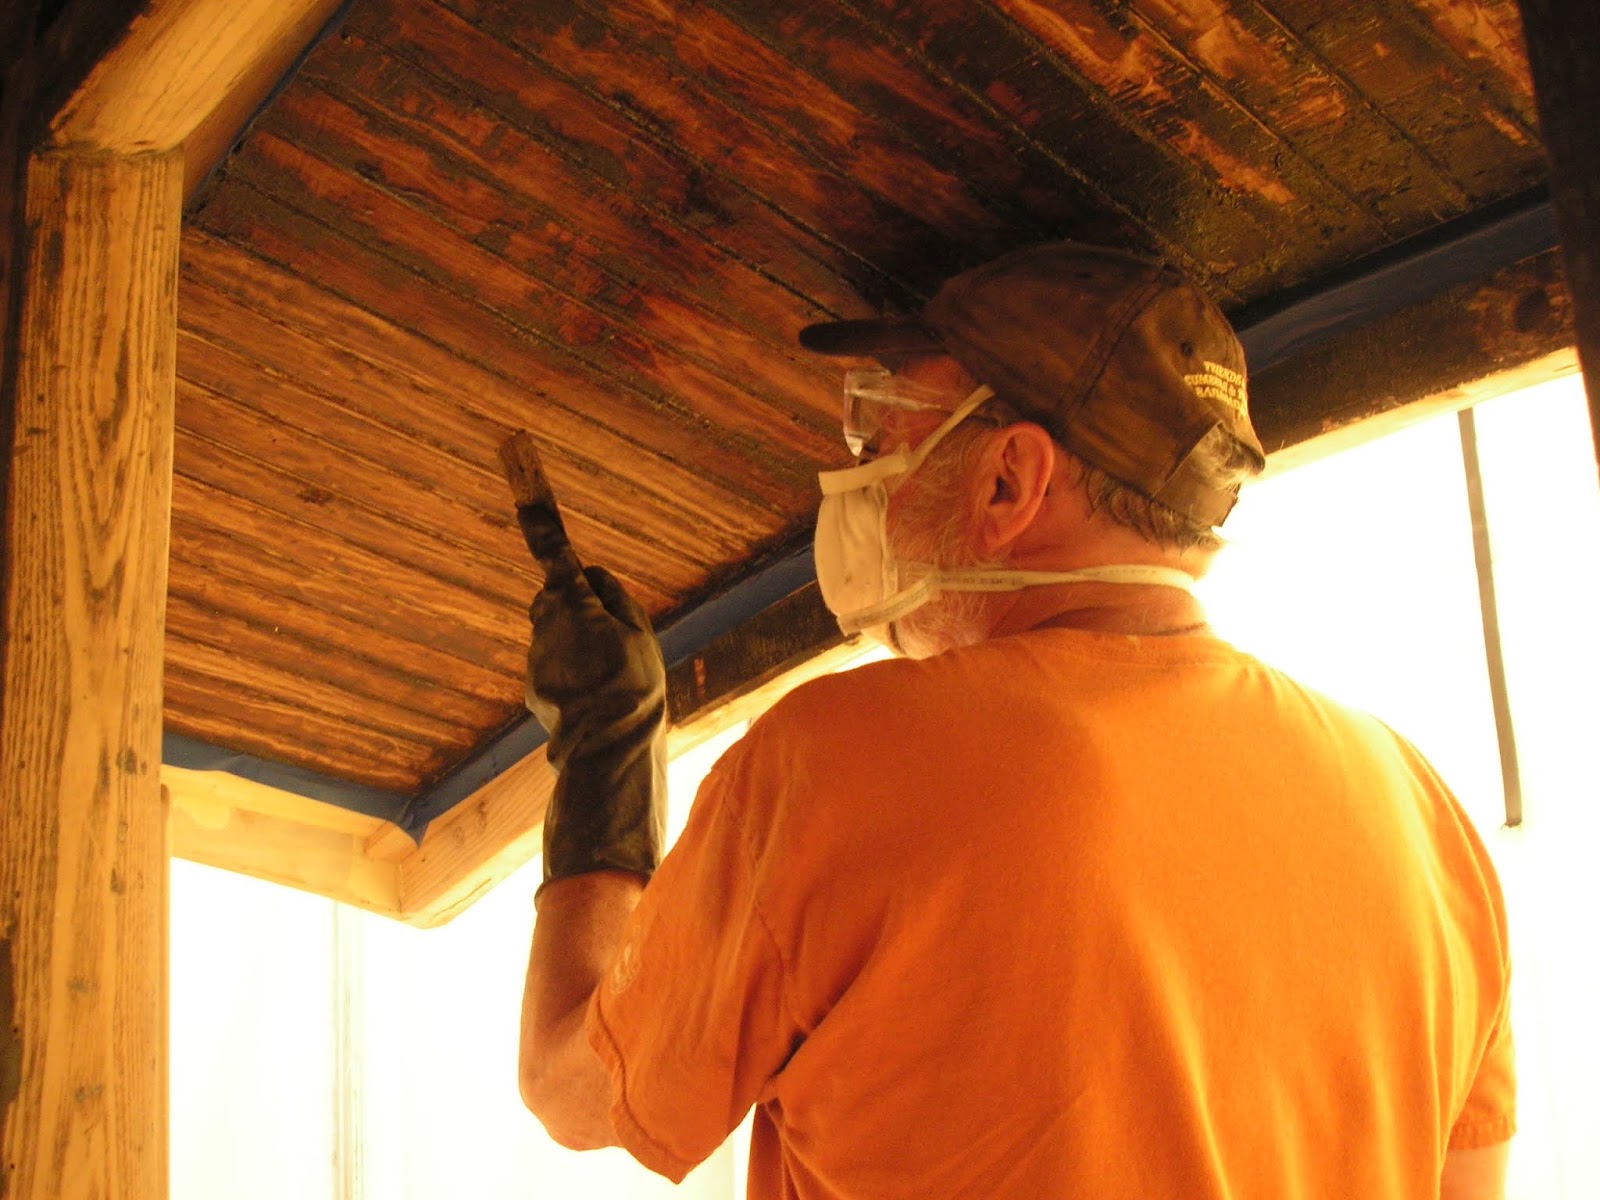
A pilot hole was drilled, then a larger hole was cut with a saber saw.  The edges were trimmed and filed so that the vent would be in an erect position on this curved roof.


It looks pretty good, guys.


We started on the flooring although installation has to wait for the bolster truck bowl or plate to be installed, a tedious process to be covered later.  In this photo Craig is positioning a floor board in the jig he made to cut a notch in the end of the board.  Each board will be notched in the ends and a spline or biscuit inserted to keep the ends from moving in relation to each other.


This photo shows how the ends of the boards will be stabilized.


Here Craig is routing the groove in one of the boards.


This photo shows Joe on the left with the two red spring pockets that he made.  An original one is to his left in front of Don while Bill K. looks on.  These go under the car attached to the steel angle brackets that have been installed at each end.  There is a diagram of this mechanism in the posting of Jan.-Feb. 2018.  The coupler attaches to this with a heavy spring which allows for some resilience when coupling cars.


Work also continued on installing the bolster truck bowls, one of which is seen here next to some vent caps.  It is upside down as it rests on the table.  The side we are seeing rests on the truck of the car and allows the truck to rotate.  The bolts holding it are carriage-type, recessed into the plate so that the surface is smooth.


This photo shows the plate right side up.  The body bolster fits into the groove where the two bolts are resting.  The large hole in the center is for the king pin which will extend through the bolster into the truck, and is the center of rotation of the truck.


Here the plate is positioned just below the bolster with bolts extending down to it through the bolster.  John and Don are marking the plate for drilling two more holes, one at each end, necessary to clear protruding bolts.


Don is marking the plate.  The brackets for the coupler mechanism are to Don's right.


The bolt positions have been marked and now the hole size is being drawn on the plate.


This is a view of the floor above showing the larger hole for the king pin and the six bolt positions corresponding to those in the bolster and plate.  Once the bowl/plate has been installed the flooring can be laid down over this area although there will be an access hole left for the king pin.  The original metal plate that covered the king pin was removed during dismantling and has been saved.  It will be re-used as well as used as a pattern for casting a second king pin cover.


Bill K. is looking toward the coupler pocket brackets from the end of the car.  The brackets have threaded rods through each end which were used in positioning the  brackets so they are parallel to and opposite each other.

Wednesday, January 30, 2019

September-October 2018

We got back to business in the nice fall weather.  We finished and sealed as much of the interior as we could, and planned for the installation of the floor and exterior roof.

There was more filling and sanding.  Ron is working on the clerestory.


Tom, Glenn, and John are reviewing photos of the roof flashing taken during the dismantling.


This photos shows pieces of the flashing that covered the bottom of the clerestory windows and were saved for reference.


This is a photo taken at the time of dismantling of the roof looking between two clerestory windows.  The metal roofing is still in place and can be seen to cover the bottom of the window frames and wrap around the post between the windows.


There are wider spaces between the windows where the seats back up to each other.  This photo shows the panel removed that covered the framing on the outside.  There is a vertical groove on the panel for a tie rod.


We have the original roof vents that were removed during dismantling ready to replace when the metal roofing is installed.  The larger ones go in the clerestory for the oil lamp lighting and the smaller ones are for the lavatories.


This is a view of the underside of a vent with Tom, our sheet metal guy, next to it.


By the end of September we were ready to seal the interior panelling.  Every surface that was not to be sealed was covered as it was planned to spray the sealer on.  Here Craig, John and (I believe) Mike are wrapping a door in plastic.


The areas around the windows not to be sealed were covered with paper and tape.


Exposed hardware was masked.


Jim K. kindly provided the use of his spray system for applying the sealer which was a clear satin material.


Here is Jim at work.


The clerestory was done as well.  Craig is minding the hoses for Jim.


Three  coats were applied with sanding between coats.


This photo shows the clerestory after sealing.  It is more reflective but not radically changed in appearance.


One of the end walls.


We started to work on the seat frames.  The ones against the outside walls will be resting on a platform of some sort so that the legs are not utilized.  This allows for a little more room in the aisle between the seats.


The frames were all cast with legs (easier for the foundry) so now half of them will have the legs cut off.  Craig is doing the cutting while Glenn will catch the leg.


Craig has been busy preparing for the installation of the flooring.  It will be fir, beautiful wood, but may be painted to be historically correct.  The wood has been milled for us, but grooves need to be cut in the ends of the boards where small pieces of wood (seen just to right of center in this photo) will be inserted in the grooves to keep the boards from shifting in relation to each other.  Craig made this jig for holding the boards while routing out the grooves on the ends.

Thursday, January 17, 2019

Summer 2018

As usual, Friends work sessions on the Railroad took many of our workers so that sessions at the COS site were fewer over the summer.

Work continued on the interior panelling, however.  Dean is sanding around the window in this photo.


Caulking and filling also moved forward with Don working around a window on the exterior.


More of the same with Ron weilding a putty knife in this photo.


John is caulking on the end of the car.  Some new people joined us and have been an immense help.


The overhangs at each end needed to have the old paint stripped and Bill L. is doing yeoman's work at this task.


Fitting and installing the steel for the coupler pockets also continued.  Bill K. seems to be one of the point men on this,  maybe because he always brings his hard hat.


The seat frame castings have been delivered.  They are going to require some grinding and polishing before finishing.


John, Craig and Ron are discussing the roof flashing along the bottom of the clerestory window mockup.  They are using pieces of the old flashing that were removed during dismantling of the car to reconstruct how the new material will be installed.


 Something like this.  There will be a piece over the lower part of the window frame which will overlap that on the roof.


The spring winds tore the zipper tape off of the tent material on the west end of the structure.  Tom and I made some repairs.


We used a hand stitcher to sew the zipper back on to the material.  It went faster with two people, one making the stitch with the needle and the other locking it on the opposite side.


The right side is the one that is repaired.  On the left double stitching can be seen which was also present on the right, but the thread is fairly thin.  A second zipper on the other end also has pulled free but not yet repaired.

Followers

Blog Archive