Friends COS calendar

A subset of the Friends of the Cumbres and Toltec Scenic Railroad located in Colorado Springs, Colorado, with the mission of preservation, restoration, and interpretation of CTSRR historic assets. The Springs group is primarily involved in restoration. See below for blog archive of older postings.

Wednesday, September 4, 2019

May - July 2019

Work continued on the interior of the car, consisting of finishing the floor, prepping and fitting the seats and making hardware for the seat assemblies.  We missed a few work sessions in May and June because of activities on the railroad in Chama and Antonito.

Prior to applying the sealant to the floor the wall was taped, I believe by Mike in this photo.


Then the floor was sanded.


The floor was sprayed with a clear sealer between work sessions and this photo shows the resulting finish.  It was covered very soon after with a heavy paper to protect it.

Craig, Don, and Ron are discussing how to proceed with assembling the seats.  This frame will be fastened to the outside wall of the car, and has had the legs removed as it will rest on a ledge that extends along the side of the car's interior.


Craig assembled a prototype seat and back which are shown here inserted into the groove in the frame.  The piece of wood on the right will be screwed to the tops of the two frames to hold them together.


This photo shows how the frames will come together, fastened to the the red oak cross pieces with screws.


Ron has been busy making hardware while in Arizona this last winter (more on this later).  These are brass caps that go on the corners of the seat backs.  The round peg fits in the groove of the seat frame and allows the back to move from an erect to flat position.


In this photo the seat and back are in the flat position for sleeping.  There would be a facing seat in a similar  position to make a bed.  It was BYO bedding back in the day.  The other two people would have a drop down platform for an upper bunk over the seats.


Here Craig and John C. are sanding the cross pieces that Craig had made previously in his shop.


It turns out that the seat backs did not move smoothly in the grooves from the flat to upright position and back again.  Some "adjustments" had to be made by removing some metal at the corners of the frame grooves.  Here Don is cutting some of the obstructing metal with a grinder.


The peg on the seat back had to negotiate this corner to go from the flat to the upright position.  The angular projections caused it to hang up so it did not move easily.
These are the offending pieces that were removed.


In this photo John E. is grinding things smooth with an air grinder.


The frames will be screwed to the cross pieces and to the walls and floor.  Here Bill L. is using a center punch to mark a frame for drilling.


Most of the holes were drilled with a hand drill as Craig is doing here while John C. holds the frame steady.


Some were drilled on the drill press by Ron and Don.


This photo shows a seat frame in place with the outside of the frame resting on a narrow ledge and the inside of the frame supported by the legs on the floor.  Note the angulation of the legs  to allow more room in the aisle for feet.  The ledge is difficult to see in this photo, but is made up of the truss plank which runs the length of the car, covered with oak panelling.


This photo shows the outside frame resting on temporary spacer blocks on the ledge.  Spacers will also be used to compensate for the window sills that keep the frame from coming in contact with the wall.


Ron has been busy making prototypes of hardware for the seat assemblies.  Here he is explaining to Bill L. how things will come together.  On the table are several pieces he has made.  The largest one is for the posts that extend from the seat backs to the ceiling of the car to support a divider between seats as well as a rest or stop for the upper bunk.


A closer view.

The sleeves for the roof vents were fitted and installed.  The original caps are on the right in this photo and a new sleeve is on the left.  At the bottom of the picture a sleeve has been fitted to the hole in the roof.


Some chisel work was needed to make others fit.


Tabs were cut in the bottom of the sleeves which will be bent over to hold them in place.


The roofers then soldered the sleeves in place to the metal roofing material.


Meanwhile in Antonito, work has been progressing on the trucks.  In this photo, the frame is largely done and the wheels are ready to mount under the frame.


Looks like an engine hoist has come in handy.


It looks like one is done.  Note the swivel plate on the top which matches the plate under the car where the car will rest on the truck.


Thanks to Don Atkinson for these photos of the truck taken while he was in Antonito.

Thanks also to John Engs and Tom Simco for help with some of the other photos.

Thursday, May 2, 2019

March-April 2019

Installation of the flooring was completed and most of the panelling on the end walls was put up.  Work also progressed on the doors, seat frames and priming the clerestory framing.

 Dean and Bill L. are installing the flooring this day.  Watch your toes, Bill.


As they got closer to the wall there wasn't room to swing the mallet to tap the boards together so they had to get creative with spacer boards and pry bars.


John joined the crew and is placing a portion of the last (ripped) board down.


Finally the last piece to the puzzle.


The floor is done!


Craig uses his router and cuts a hole in the new floor.


This is for access to the king pin which passes down through the floor and into the truck allowing the truck to rotate on turns.


This is one of the original plates that covered the king pin.


 With the floor completed the end walls can be finished since the wall boards overlap the floor boards.


Dean is nailing a board in place.


Looking good!


Here is a close-up of one of the panels.


Next the base boards go in.  First they were sanded, in this photo by Mike and Don.


The ends of the boards were cut to 45 degrees where they abutted one another to provide an overlap.  Craig is adjusting the chop saw.


The first one is in place.


A narrow piece of moulding goes on top.


The "bull nose" moulding will go on top of that.


First Craig needs to shave down the finish boards to be even with the framing.


The bull nose moulding is shown in place at the top of the photo.


A considerable amount of filling of nail holes and sanding was done by several of us, me included.


Jim K. is adjusting the strike on one of the doors.


This is the original hardware that has been cleaned up.  It looks good!


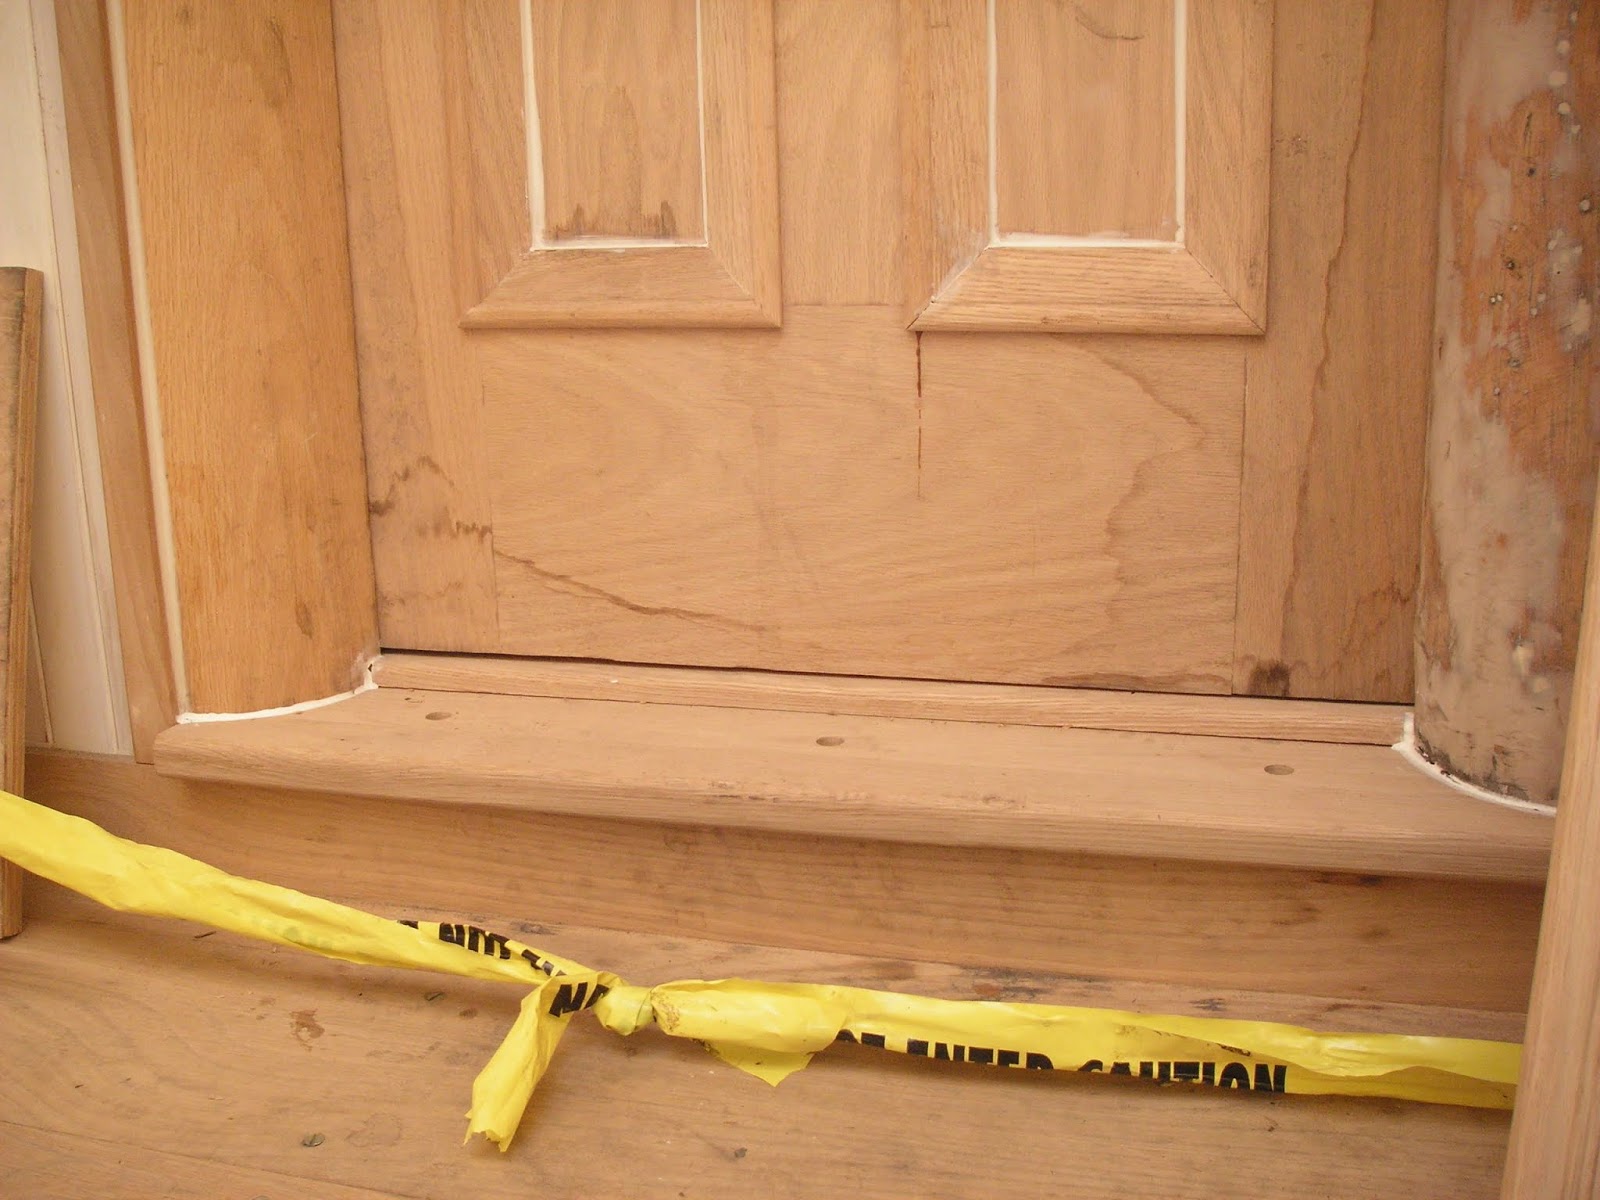
Craig is sanding the door frames.


He has made and installed thresholds.  The gap looks good.


A view from above with the door open.


There was more grinding of burrs on the seat frames.  On the left Don is using a grinder with a  disk and on the right Mike is using a small wheel on a drill to get in the smaller spaces.


The seat frames were sent out for blasting and powder coating and came back promptly looking very good.  This is one of the outer frames that goes against the wall with the legs cut off.  Wooden arm rests that Craig  made are mounted on the arms.


In this photo the frame has been positioned on the bull nose moulding temporarily. centered on the wider space between the windows.  It will be fastened to the wall and a second frame with legs will be opposite to support the seat and seat back.


Tom has been priming the framing in the clerestory.


He is doing that before the copper sheet metal below the clerestory windows is installed.  It will overlap the metal on the roof already in place.


One side is done.


I have had a question from a viewer on how the roofing pieces are joined together.  First a bend is put in the edge of a sheet and two sheets are overlapped as shown here.


Then the seam is pounded down flat as shown in this view of the ends of two sheets.


Finally the seams will be soldered to prevent water intrusion.  In this photo there is soldering around the vent but the seams between the sheets have not yet been done.


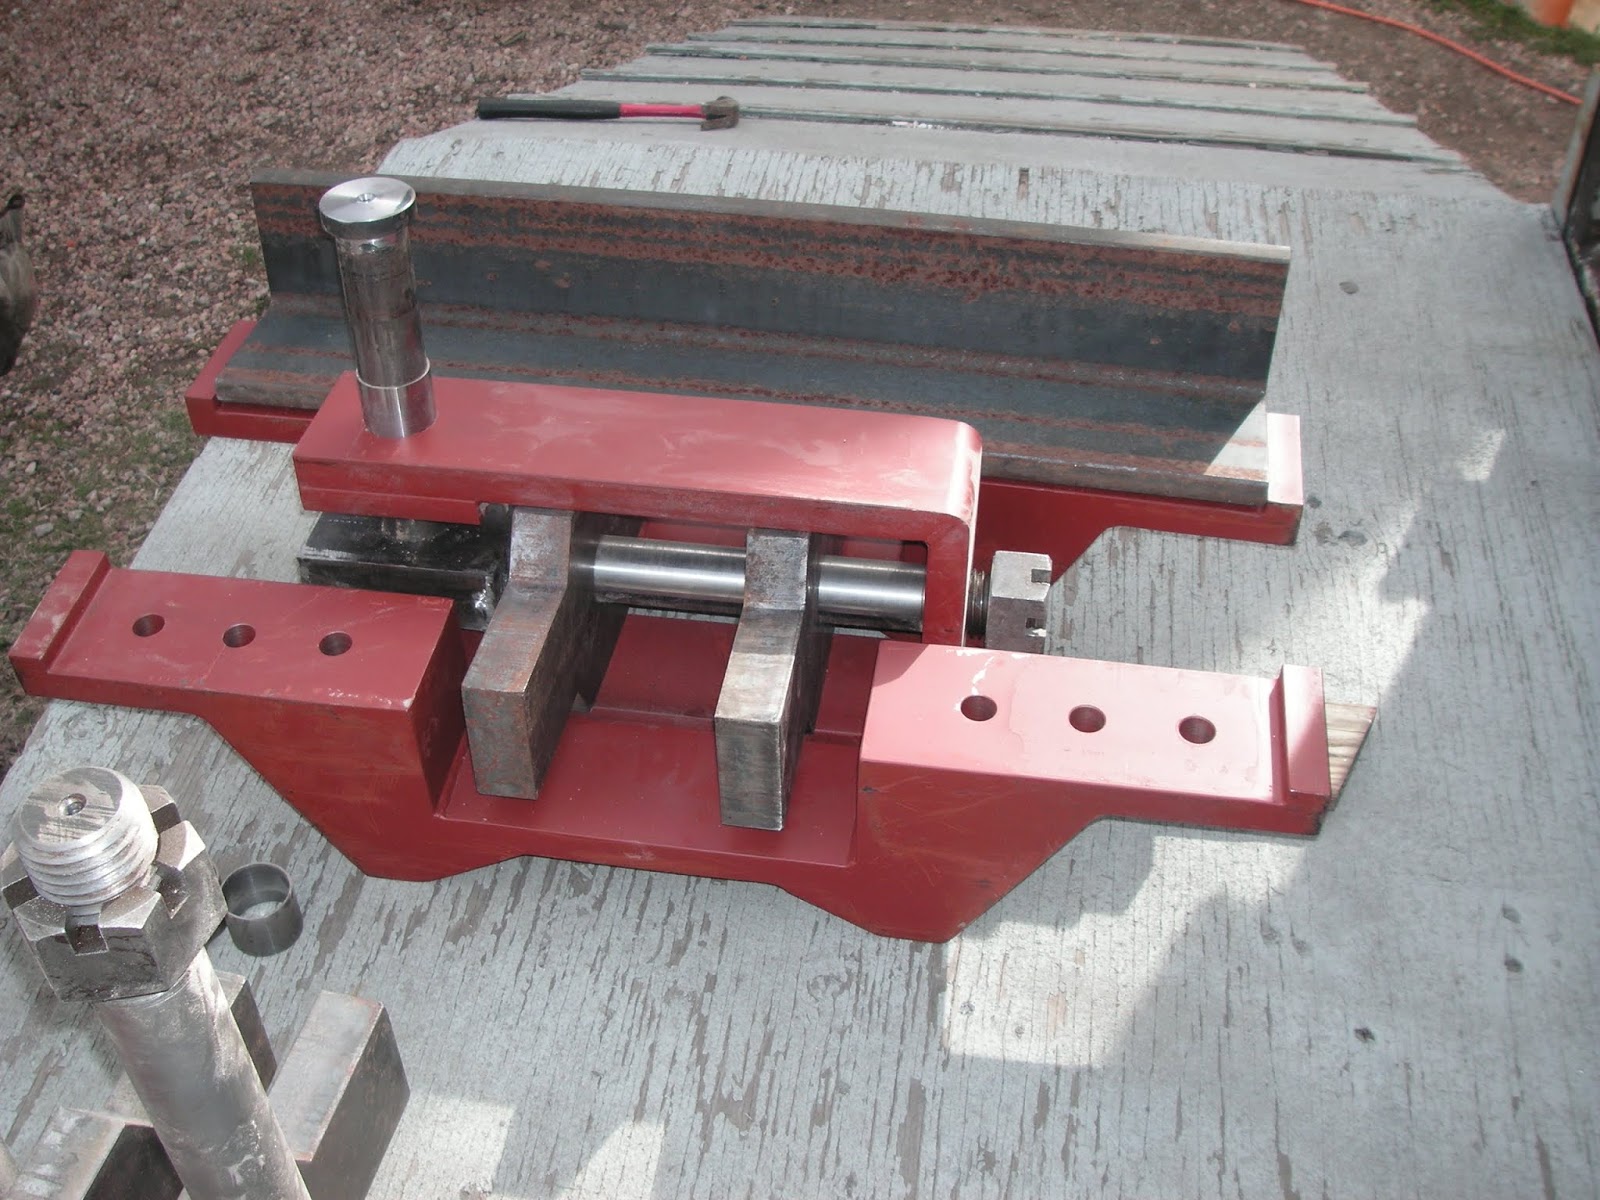
John gave a demo of the coupler pocket components at the last work session.  Observers are, L to R, Craig, Mike, Bill L. (top of head only), Don and Jim M.


The king pin is in place in the left of the assembly and the coupler will attach on the right.  There will be three springs on the horizontal shaft between the bars to cushion the actions of pulling, coupling, etc.  The unpainted angle piece will attach this assembly to a steel bracket already in place under the car.  Final assembly and installation will be done next spring in Antonito.


Thanks again to John, Tom and Don for contributing photos.


Followers

Blog Archive