Friends COS calendar

A subset of the Friends of the Cumbres and Toltec Scenic Railroad located in Colorado Springs, Colorado, with the mission of preservation, restoration, and interpretation of CTSRR historic assets. The Springs group is primarily involved in restoration. See below for blog archive of older postings.

Saturday, May 23, 2015

March Madness - March 2014

I will cover what we did in March in this post and subsequently do April and May, which hopefully will get us current.  March was a busy month as we had 4 work sessions to move things along more quickly.  Extra sessions were added the Wednesday after a regularly scheduled session and participation was quite good.  Work continued on the bolsters as well as starting to install the roof decking and reworking the new outer sill that was out of position.

The first work session was a scheduled open house in conjunction with the Streetcar Museum.  We were greeted with about a foot of snow, so paths had to be cleared for guests to access the areas.


Everyone chipped in with whatever implements were available to move the snow out of the way.  I believe it is Bob with the shovel on the left and Don with the wheelbarrow.


Displays were set up in the car and here John is showing a guest what it will look like when done.  Behind John are some drawings of the car.


The most obvious change in appearance in March was the beginning of the installation of the roof decking.  The boards were oiled prior to installation at Jim's shop.  He is on the left in this photo and was a professional cabinet maker so is a valuable addition to our group. Ron and John also helped with the oiling.


 After oiling the boards were moved out into the sun to dry.  If the shop looks like an airplane hanger, it is.  It is located at a small airport nearby.


Old nail and screw holes in the carlines were filled before nailing the new boards on.  Here Lenny is hard at work.


This photo  shows the holes filled and sanded, ready for new nails.  The fascia and one row of boards have been installed in this view as well.


The chop saw was set up in the car to cut the roof boards to length.  Bob is doing the honors at this time.


The boards are then handed up to the crew on the scaffold to be nailed in place.  Jim's nail gun provides consistency in nailing as well as minimizing damage to the boards.


Here is the view from below.  Visible progress, eh?


More platform boards were cut to complete the platforms around the car to support workers and the scaffolding to work on the roof.  Bob and Ron are teaming up here.


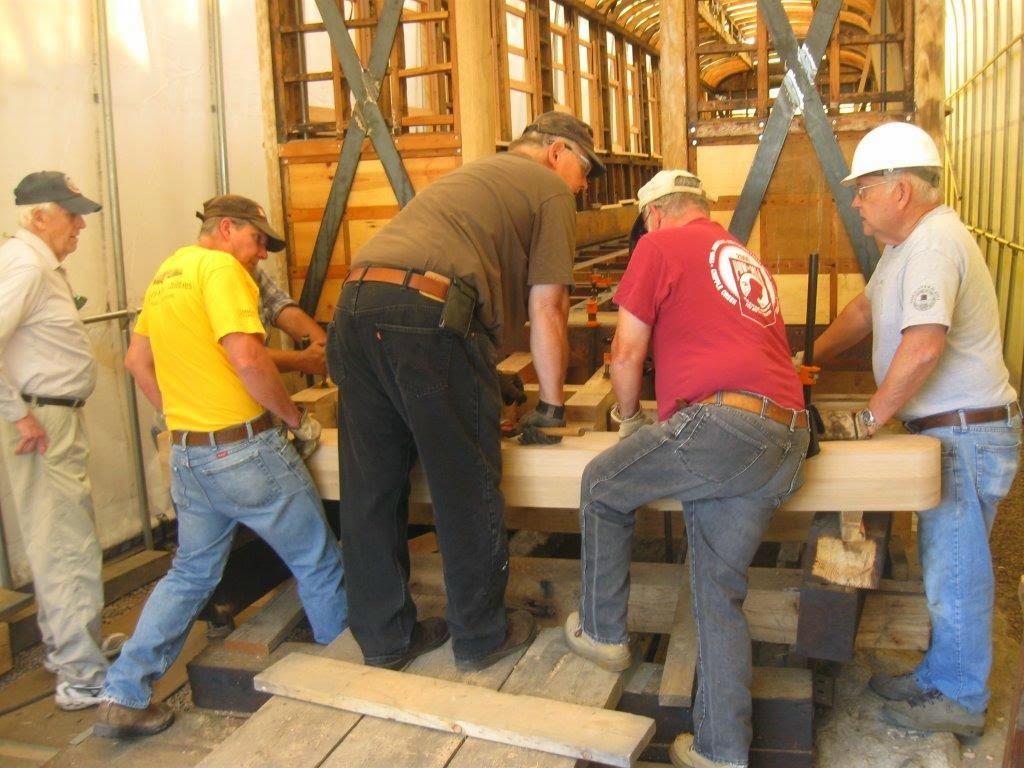
On the May 11 posting there was a photo of the new outer sill showing a misalignment of the sill relative to the bolster, with the sill inboard from the tip of the bolster.  So the sill needs to be shifted outward, which John and Bill K. are attempting to do here with a hydraulic jack.  Also, it means that the framing braces must be redone as well in that segment of the sill.


It also means that some of the tie rods must be lengthened to fit the new (original) width of the car.  In this photo Ron is threading rods for replacement.


Also in March, drilling continued for installing the bolsters.  They will be bolted to the outer sills, and holes in the wood need to be aligned with the holes in the steel.  The best way to do that is to drill using the holes in the steel as a guide, but that involves defying gravity.  So our team got creative with the magnetic drill, not relying completely on the magnet.


This photo shows the business end of the drill passing through the steel bolster and into the wood.


Again, many thanks to Tom Simco and Glen Hall for sharing their photos.


Thursday, May 14, 2015

2014 Project report by John Engs

With John's permission I am posting his project report on 0252/470 that he did for 2014.  It summarizes work through August 2014, and contains some detail that I have not included previously.


Click here to view the report.


August 16, 2014

Monday, May 11, 2015

Bolsters and body truss rods - Fall & Winter 2014-15

To refresh our memories, the first photo is of a drawing of the under carriage of one end of the car at the trucks or wheels showing the bolster in cross section running across the width of the car.

The truss rod bracket is under the bolster and is bolted to the outer sill on each side.  The round part is a clevis to which the truss rod is fastened, shown here sloping downward and to the left.

The photo above shows the bolsters before installation.  The lower straight piece was on the car.  The curved piece was removed and scrapped previously, and new one fabricated by Urich.  They will be bolted together eventually, with the curved piece underneath.

The photo above shows one end of the bolster in place with temporary bolts through the outer sill.

This is a view under the car along the bolster.  Notches had to be cut in the platform sills to accommodate it.  It passes under the steel that is reinforcing the inner sills.  The bottom of the steel is lower than the original sill and spacers are required to lower the bolster and truss rod brackets appropriately.

In this photo Bob and Don are drilling the bolt holes in the brackets and spacers that will support the bolsters and to which the truss rods will be connected.

Here a spacer is being drilled with the magnetic drill. using the matching bracket as a guide.  The drilling was a slow process and continued for several weeks.

I jumped ahead in time, but this is one of the truss rod brackets in place, with the spacer next to the sill, and the bolster between the spacer and the bracket.  This process also was ongoing for several weeks.  Aligning the bolt holes was tedious.

 This photo shows the bolster at the east end of the car extending beyond the sill (the end is in the lower part of the picture just to the right of center, orange in color).  This means the car is too narrow in this area.  This is the sill that was replaced early on because of rot, and apparently warped or shifted during replacement.  More on this later.

Saturday, April 25, 2015

Letter boards - Fall-Winter 2014

Work on the letter boards spanned a rather long period of time as other things were happening concurrently.  The letter boards are wide boards that extend the length of the care over the windows and under the cornice which often displayed the name of the company that owned the car.  Thanks again to Tom Smco for providing some of the photos.

This drawing shows a letter board on a coach that has the number 91 on it for identification.


This photo shows some of the boards that Craig brought to the work site ready to be fitted.  It is apparent that considerable work has already been done to get to this stage.


Bob and Craig are doing some final fitting at the work site of one of the end pieces.  The corners on the ends are dove-tailed together.
 

We built platforms along each side of the car to improve access to the work areas without having to move ladders, etc.  The photo on the right shows a board clamped in place before finally screwing it on to the car.  Note the end of the board which will be overlapped with the adjacent one.

The photo above, left shows the work platform on the side of the car.  The sections are removable and can be transferred to the other side as needed.  On the right Don and Bob are fastening the letterboard with screws.

The photo above shows how the boards are fastened with counter sunk screws.
The screw holes are then filled and sanded smooth.


The corners are dovetailed as shown above.  The end of the car is on the right.  Here part of the arched piece could be used and just the corner replaced.

This is the same corner as above and the finishing piece of ash has been placed over the framing.  Clamps are holding it in place at this time.

This photo shows the finished end piece.  Getting the arch correct was "interesting" but Craig did an excellent job.

Tuesday, April 7, 2015

Odds and Ends, June thru September 2014


Considerable drilling had to be done through wood and metal to fasten the end platforms securely to the car framing.  In the first photo Lenny is using the magnetic drill to drill a bolt hole through the steel that is reinforcing the inner sill as well as the steel on the inner platform sill.


The next two photos show the eight bolts in place securing the wood sills and steel angles of the car and platform together.


This photo was taken of 0252/470 in Chama prior to moving it to our work site in Colorado Springs.  I am showing it to show the vertical window trim on each side of the the windows.  It is grooved in a pattern that is not readily available currently.  (Click on the photo to enlarge.)


The pattern is duplicated on this planer/moulder knife, and stock was run through to obtain matching material.


New on the left and old on the right.


Finally, Craig picked up the bolsters from Strasburg, CO where Urich fabricated the arched part that was removed from the car.The straight piece beneath was left on the car.  They will be installed with the arch down and bolted together.


The bolsters are fastened under the car at each end where the truck pivot pins are located to provide support and stiffness.  The bolster is colored red in this diagram, and is oriented transversely across the car.  Many hours were spent fitting these, but  more on this later.

Wednesday, February 25, 2015

Platform Framing: June-August 2014

Most of the summer of 2014 was spent on the end platform framing, and I will devote this post to that effort.  The first photo is from January of 2011 showing the condition of the timbers in the framing.  There are tie rods in place running longitudinally with the car which have been cut.  There also are tie rods across the framing at the blocks on the left side of the photo.

Because of the condition of the wood on this car measurements and photos were taken of the sister car at the Colorado Railroad Museum in order to duplicate as closely as possible the original arrangement.

The second photo is a view from below looking at the framing.  The spacing blocks were morticed into the sills and held together with tie rods as well as bolts.


The third photo shows the gluing of the laminated end sill of the platform.  The sill extensions were made in a similar fashion from white oak in Craig's shop.  To quote Craig, "You can't have too many pipe clamps."


This photo shows one set of sill extensions that have just been oiled.  The cut out portion is the inner end and fits under the supports for the trucks.


Multiple trial fittings were done in order to fit the sills properly.  This is one of the earlier ones.  Modifications had to be made for the steel that has been added earlier.  Note the wedges added to the upper surface that will slope the platform for drainage.


Mortises were made for the spacer blocks between the sills using routers, chisels, etc.


The photos below show more shaping that had to be done to accommodate steel, etc.  Also, bolt heads and nuts had to be recessed.


Craig made a pattern for the end sill and fitted it to the sill extensions.  He and John are checking the spacing which is not parallel,  The sill extensions diverge slightly toward the end sill.


Here we are fitting the end sill on to the sill extensions, aligning the tenons with the mortises in the end sill.  Tie rods will hold everything together.


Another view of one of the many trial fittings.


The photo to the right shows the framing in place with spacer blocks, held together with pipe clamps.


Bolts were placed at strategic locations--


--at both ends of the sills.


Finally, angle steel was fitted along the inner sill extensions to provide further strength and rigidity to the platforms.  This is a view under the care looking toward the end.


The last photo shows the inner end of the sill extension with the angle steel around it.

Many thanks to Tom Simco for the photos taken at work sessions that I missed.


Followers

Blog Archive