We continued to install the siding panels on the east end of the car. In this photo I am holding the panel in place while Craig inserts the screws from the back side.
Here he is on the other side placing screws through the wood blocks into the siding panel.
After installation, the panels were primed on the outside with an oil based primer by Bill L. and Ron.
The west end panels are installed and primed.
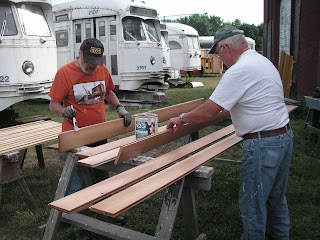
In this photo Bill L. and Ron are priming the cedar boards for the underside sheathing before installation.
Cutting and fitting the sheathing under the car was difficult because of the complex framing. Here Bill K. is screwing a board in place.
Meanwhile work continued on installing siding. Here Craig is cutting primed boards to fit.
These boards are going between the windows, and Craig is nailing one in place with the nail gun.
This side is looking finished.
We had some uninvited guests this summer in the form of wasps. There were nests on and in the trailer as well as in the pipe for the hand rails to the steps into the trailer. John, with deadly accuracy, took care of them, however. Fortunately no one got stung.
We had to jack up the car and move the support blocks and beams to access parts of the underside for the moisture barrier and sheathing installation. This heavy duty jack was borrowed from the Trolley Museum and made lifting the car look easy. John is doing the heavy lifting here.
This steel beam can be moved now.
In this last photo Bill K. is placing blocks in a new position under the car.
Friends COS calendar
A subset of the Friends of the Cumbres and Toltec Scenic Railroad located in Colorado Springs, Colorado, with the mission of preservation, restoration, and interpretation of CTSRR historic assets. The Springs group is primarily involved in restoration. See below for blog archive of older postings.
Wednesday, November 9, 2016
Wednesday, November 2, 2016
July 2016
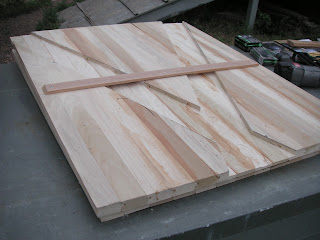
Craig's solution was to make a panel of the siding boards by gluing them together and then routing out grooves for the steel braces as shown in this photo.
The panel fit over the braces as shown here. Wood strips were nailed and glued onto the framing so that screws could be used to hold the panel in place.
This photo shows a closeup of one of the wood strips with a screw into the siding.
After the fitting Ron applied primer to the inner surface.
Mean while work continued on the under side with cutting and fitting the moisture barrier. Bob is cutting in this photo.
At the same time cedar boards were installed over the moisture barrier. Bob is doing the measuring and cutting.
Bill K. is under the car doing the nailing while Bob is measuring for the next piece.
Subscribe to:
Comments (Atom)


