This photo shows Craig drilling through the metal bracket for the stairs into the stringer in preparation for securing the steps to the car with bolts.

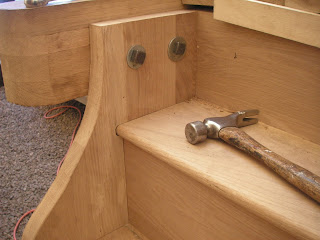
In the photo on the left two bolts have fastened one side of the steps to the car bracket. The stairs were centered and leveled prior to drilling the holes.
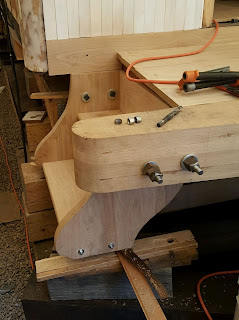
The other side of the steps was bolted to the end sill of the platform.
The steps on the other side of the car are shown here with both sides bolted on.
These bolts are temporary, but this photo shows that the nuts are counter sunk. Proper length bolts are being obtained.
Here Craig and Debbie are getting ready to fasten down the oak decking on the platforms.
First holes were drilled and countersunk through the oak boards.
Then the screws were inserted with an impact driver after being coated with beeswax. Having put in some of these myself I can attest to the fact that they will not come loose.
This is a photo of our car when it was in service as a kitchen/diner. John noted that the end of the platform end sill was narrowed with some of the wood cut away underneath. (Click on image to enlarge.)
The decision was made to remodel the ends of the sills to conform with the original appearance, and in the photo Craig is starting to grind away.
He used an oscillating tool as well and it is taking shape nicely.
Quite a bit of time and effort was spent on preparation for insulation of the car. One of the chores was to replace the spacer blocks under the windows that were removed during disassembly. One of the blocks can be seen in this photo next to the metal square on the saw table and one can see that the shape is unusual. Of course we were short a couple of these when it came time to replace them so we had to make new ones using an old one as a pattern.

The photo to the left shows Ron replacing the blocks under the windows and nailing them in place.
Work also continued on cleaning out the floor spaces and sealing around the framing. Ron is wielding the vacuum in this photo.

This photo shows strips of plastic around the framing in preparation for spraying in the foam.
The bolts and tie rods in the framing were tightened prior to insulating. Here Ron and Bill K. are working on the bolts between the inner sills. There are pipe spacers between the sills to keep them apart.
In this photo Bill is nicking the threads on the vertical tie rods so the nuts will not move.
The insulating company came on two consecutive days during the week and sprayed the insulation on the floor and ceiling. The windows were covered with plastic prior to spraying. In this photo a worker is starting at the east end of the car spraying the floor.
Here is a closeup of the spray gun in action.
This photo shows the car after completion of the spraying.
There was some overspray and here Bill K. is cleaning off the rafters. The sections where the compartment dividers will go were not sprayed as can be seen in the upper right corner of this photo.
Another job that was started this month was to caulk the roof, nail holes, grooves, etc. Here Don and Bill L. are assembling the platform along the north side of the car for access to the roof.
Then the scaffolding gets assembled on the platform.
They are starting to work on the roof at the east end.
 Don is filling nail holes from the scaffold in the photo on the right. But sometimes you just have to get on top of your work, as on the left.
Joe finished polishing the welds on the queen posts. They are looking good.
Joe also welded a flat piece of steel onto the post of the jack for the trailer as shown here.
At the last work session the trailers were loaded to move some things down to the RR as the summer work sessions are starting. Here the crew is loading posts for the corrals, I believe.
The threading machine is on Craig's gooseneck to go back as well.
So we will be taking a break for a few weeks in COS during the work sessions in Chama and Antonito. We resume in mid-June.
Thanks again to John and Tom for photos.


No comments:
Post a Comment