Friends COS calendar

A subset of the Friends of the Cumbres and Toltec Scenic Railroad located in Colorado Springs, Colorado, with the mission of preservation, restoration, and interpretation of CTSRR historic assets. The Springs group is primarily involved in restoration. See below for blog archive of older postings.

Wednesday, November 2, 2011

Summer day 7-30-2011

These photos look pretty good with some in shorts and T-shirts, as I sit here on a November day with a blizzard winding down.  Fortunately in Colorado there can be big changes day to day, and we are planning on another work day this Saturday.

But back to July.
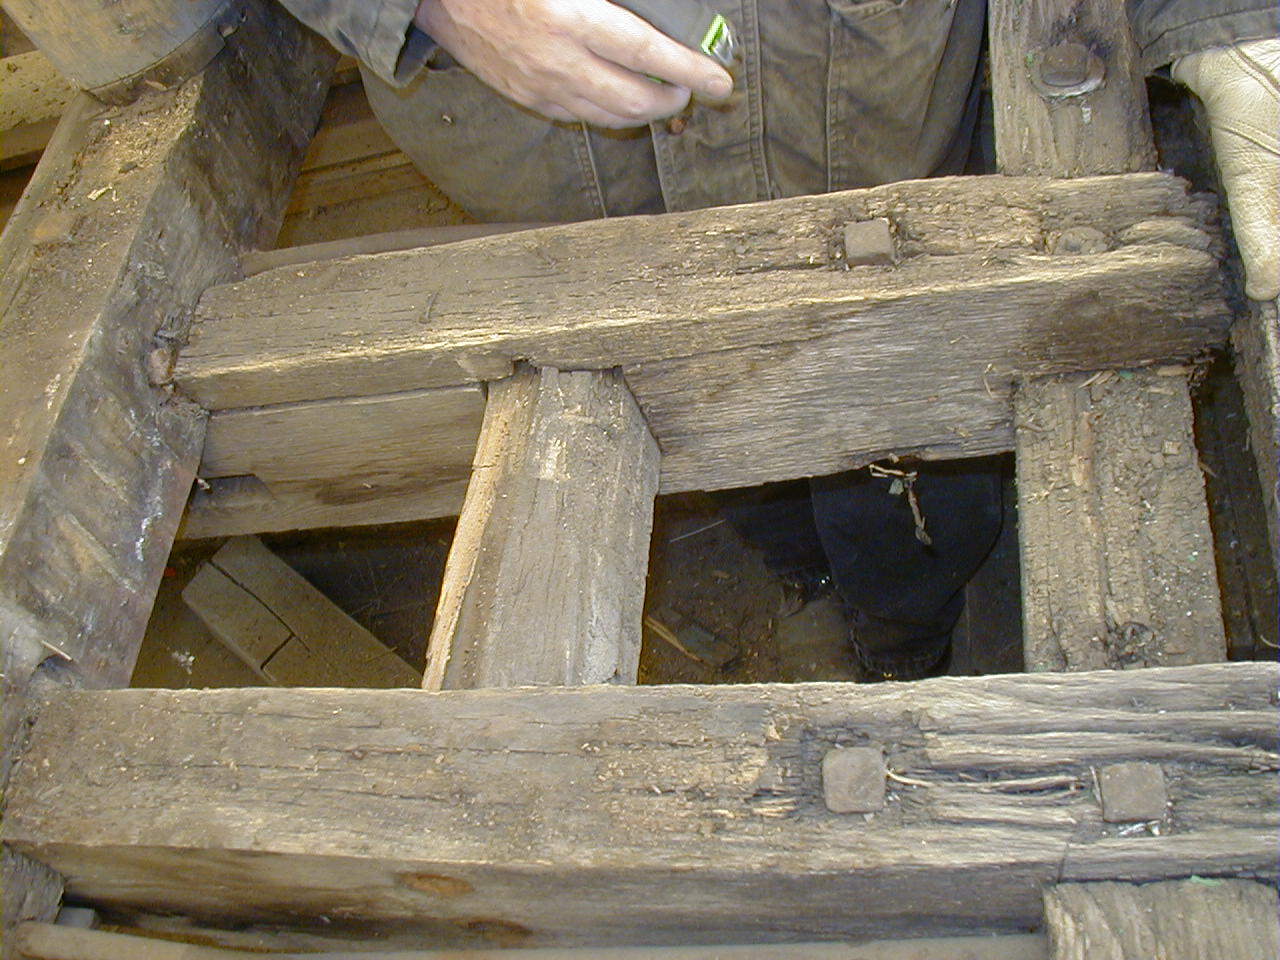
The roof framing is shown from below and above in the photos above.  The deteriorated members have been replaced, and appear lighter than the old ones.  We have started to treat them with linseed oil, and eventually all of the framing will be coated with oil.  We have had an ongoing discussion of nomenclature of these framing members regarding carlin/carline/carling vs. rafter.  The Railway Car-Builder's Dictionary calls the upper longer pieces "carlines" and the shorter clerestory pieces "rafters."  Anyone with other information on this is welcome to join the discussion.
The photo above shows the framing at the end of the car with the decking removed.  Some new (lighter colored) rafters/carlins are visible.
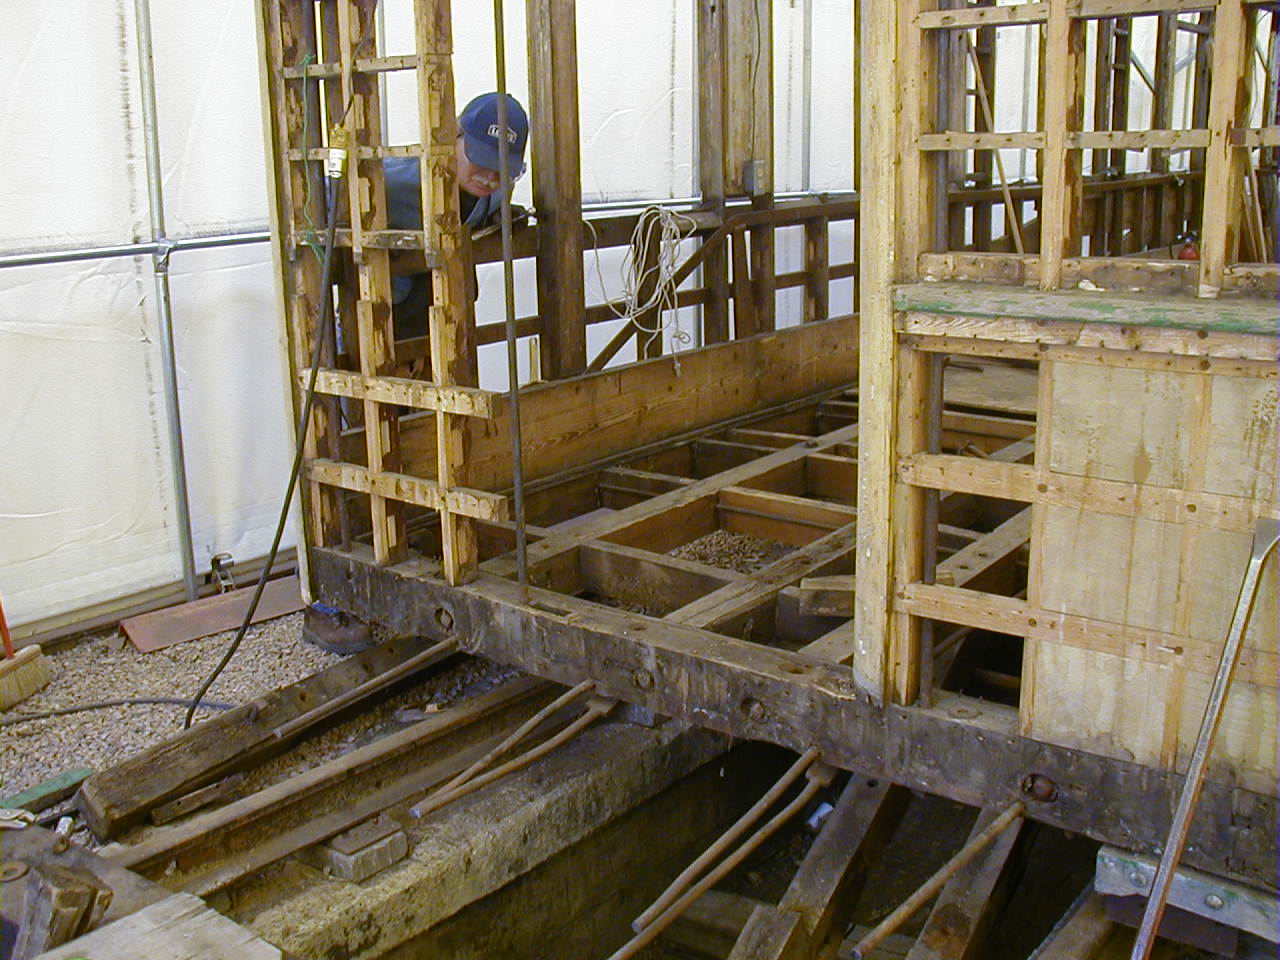
Above is a view from the inside of the car end.  It can be recalled from the earlier photos that there are storage cabinets at each car end under the center raised roof area.  Craig has made a new frame for the cabinet at this end.  Note the hole in the bottom center of the frame: this appparently is for a pull cord for an emergency warning or stop signal.
New window frames have been made by Craig, and one installed as in the photo to the right.

The vertical posts in the corner where the old icebox was located have been replaced.  On the right, above, it can be seen where the post is (was) mortised into the sill that has rotted.  There has been much discussion on the best way to remove and replace the sill, given the mortises and other fitting that must be done.  More on this will be forthcoming.

Sunday, October 30, 2011

What summer? 7-24-2011

Work continued on 470 without me for most of the summer.  Glen Hall kindly supplied some photos of progress during June and July.  Work sessions in Chama and Antonito, as well as vacations, etc. resulted in some speed bumps as well.
By this time, the roof decking has been largely removed except for the car ends.  Craig has fabricated new carlins to replace those that have deteriorated.


Rich is working to remove decking from the west end.  Fortunately he is not afraid of heights. :-)
Tom continues with removal of what is left of the east end platform. 

Vertical metal braces to support the roof structure have been placed since there is little else holding it at this point with removal of so much material.
This "Disposition Tracer" was found while dismantling one of the end roofs, I believe the west.  It is dated 1939, when the D&RGW was using the car for maintenance of way as a diner-kitchen car.

Wednesday, June 8, 2011

Coach door hardware 5-7-11

We are fortunate to have some of the original door and window hardware that remained in the coach.  We have had a request for images to be made available of these, and here are several.  Craig has built reproduction doors and window frames using original patterns that were existing in the car.  He has mounted the hardware in one of the doors (we have only one set), and the photo above shows an almost face-on view with the door closed in the frame.
Here is a view from the edge of the frame, also with the door latched.  I believe he scrounged a key from somewhere - I don't think it is original to the car.
This is a view of the edge of the door as it is open.  The background is somewhat confusing, but the lock box is mortised into the door with two depths - a wide shallow mortise, and narrow deeper one.
This is view from the side of the door opposite the lock box.  The mortises on the other side can be seen from here also.
Finally, a view of the frame with the door open and not in view.  The latch also is mortised into the frame.
This is an example of the window hardware, basically a knob to aid in sliding the window up or down.  Spring devices in the window track keep it in position, raised or lowered.

Gathering 5-5-11

It has become time to think about raising the coach, and we needed cribbing to support it.  Tom and I made a trip to Denver in early May to obtain a load of ties.  The easy part was loading them on the trailer which was professionally accomplished by the folks at Kopper's.
While it was a little windy that day, it seemed unlikely that the load would blow off the trailer.  Nevertheless, we secured the load with tie-downs, at least for the sake of cosmetics.
The rest of the day was not so easy.  We stopped at Cliff's in the hills outside of Conifer to pick up the Lolley columns used in the construction of his house, a work in progress.  It is a beautiful house on a beautiful site on a cliff, with gorgeous view of Pikes Peak off the deck.  The columns were used to provide inside support for the concrete foundation as it was poured.  They were robust, heavy, and long. and needed to be sectioned to remove them from the house.  He has donated them to the Friends and they will find a home in the CRF in Antonito for some construction of additional storage space.  I could not negotiate his driveway with the trailer, so we loaded the columns onto his truck and transfered them in the street.
Here we are loaded ready to go.  My mileage going downhill to Conifer was spectacular.  Fortunately, we had help unloading from the Community Service people at the Trolley Museum.  The TM has been most generous in sharing these people with us as we need extra help, and we thank them. 

Tuesday, May 3, 2011

End platform and roof removal 4-29-2011

We are saddened by the death of Rosemary Sandell over the weekend.  She was a delightful, upbeat, and hard working member of the Friends, and will be missed by all.

This was a cool, but not unpleasant day when we removed the west end platform framing which was cantilevered on to the sills running the length of the car.  Glenn is recording measurements and will make drawings of the construction of the framing of the platform for future reference.  In the photo on the right, above, some of the notches and mortises are visible in the framing.
It was a day for the sawsall as the photo on the left, above shows.  The tie rods (6) were cut as well as the longitudinal beams that were bolted on to the end cross piece.  Then the cantilevered beams were removed which involved getting down and dirty in the pit under the car to remove nuts and lag bolts.  John and yours truly shared that privilege.

 
On the left, above, Ray actually caught me working, trying to remove a long bolt holding the beams together. Some were bent suggesting some force on the end platform at an earlier time. On the right, above, Ray has taken a break from roof removal to check our efforts. The platform structure has been removed from the car, although two of the beams can be seen hanging from the track brace below the car.


Tuesday, April 26, 2011

Laminating beam, etc. April 14-16 2011

Several of us convened at Craig's workshop on April 14th and 15th to construct a laminated beam to replace the deteriorated portion of the lower north sill on 470.  Craig found some very nice, (almost) 2" douglas fir in 12 foot lengths with straight grain and few knots.  In the photo above on the left, George is receiving a piece from the planer, as well as a sawdust bath.  The pieces were then laid out, with the first two joined with a lap joint end-to end.  Subsequent pieces were cut so that the breaks were in different locations.  It has been decided to replace 22 feet of the sill, so with a 24 foot beam there will be plenty of length to work with.


Glue was applied to each layer, and clamps applied at close intervals along the length of the beam. In the photo on the left, John is applying glue, while Tom, Craig, and George are supplying moral support. On the right, above, John is tightening one of many clamps used.

On the next day, Friday, another piece was glued on to one side of the beam to span the edges of the pieces that were glued together previously.  The photo on the left, above, shows this with the clamps in place.  Note the thinner piece in the center that was used to achieve a dimension close to what is needed.  This was obtained by cutting a 2" piece on the bandsaw.
On Saturday, after clamp removal, the beam was run through the planer several times to get it down to the proper dimensions, and taken several blocks to the work site as shown on the right, above.  It even looks quite straight.  The sill that will be replaced is the lower one adjacent to the new beam.  The vertical and horizontal framing members are mortised into the existing sill, so more work will need to be done on the new one before it is ready.


Craig has also been busy with other things.  He has built new doors using the original hardware (cleaned up beautifully), with molding and sliding windows duplicated from the the old ones.  He also has made arched carlines to replace bad ones as necessary in the roof structure.
Meanwhile, on our regular work session on Saturday, most of the west platform has been uncovered showing the framing structure.  The platforms are cantilevered from the under carriage of the car, and were finished with tongue-and-groove decking that is quite deteriorated. 
Bob and I continued cutting and threading tie rods to replace rusted ones.  We finished this project on Saturday, and made some extras, as well as threading pieces for use in the future on other projects.  Note the always handy roll of duct tape.


Wednesday, April 6, 2011

Details....

We had a relatively small crew this day, but work proceeded on threading truss rods as well as removing roof decking and site clean-up.  Each work session more construction details become apparent to us.  On the left, above, a bolt head is visible on the face of the sill at the roof junction which appears to be a lag bolt.  However, in the photo on the right, above, it can be seen that there are nuts on these bolts that have been inset into the roof support.


In the photo on the left, above, John is making some adjustments to wiring (temporary), while Glenn, our chronicler and resident structural engineer looks on.  The wood stacked next to John consists of framing pieces that Craig has made to replace ones in that corner of the car as the lower (deteriorated) sill plate is replaced.  On the right, above, it can be seen that the sill at the roof edge at the junction with the wall is bevelled on the inside to conform to the curvature of the ceiling so that there was a smooth transition between wall and ceiling.


Finally, at the end of the canopies, the framing members are dovetailed together as shown in the above photos.  In addition, the side member is beveled to take the end fascia, also beveled to make a well detailed corner.

Followers

Blog Archive