Friends COS calendar

A subset of the Friends of the Cumbres and Toltec Scenic Railroad located in Colorado Springs, Colorado, with the mission of preservation, restoration, and interpretation of CTSRR historic assets. The Springs group is primarily involved in restoration. See below for blog archive of older postings.

Tuesday, April 26, 2011

Laminating beam, etc. April 14-16 2011

Several of us convened at Craig's workshop on April 14th and 15th to construct a laminated beam to replace the deteriorated portion of the lower north sill on 470.  Craig found some very nice, (almost) 2" douglas fir in 12 foot lengths with straight grain and few knots.  In the photo above on the left, George is receiving a piece from the planer, as well as a sawdust bath.  The pieces were then laid out, with the first two joined with a lap joint end-to end.  Subsequent pieces were cut so that the breaks were in different locations.  It has been decided to replace 22 feet of the sill, so with a 24 foot beam there will be plenty of length to work with.


Glue was applied to each layer, and clamps applied at close intervals along the length of the beam. In the photo on the left, John is applying glue, while Tom, Craig, and George are supplying moral support. On the right, above, John is tightening one of many clamps used.

On the next day, Friday, another piece was glued on to one side of the beam to span the edges of the pieces that were glued together previously.  The photo on the left, above, shows this with the clamps in place.  Note the thinner piece in the center that was used to achieve a dimension close to what is needed.  This was obtained by cutting a 2" piece on the bandsaw.
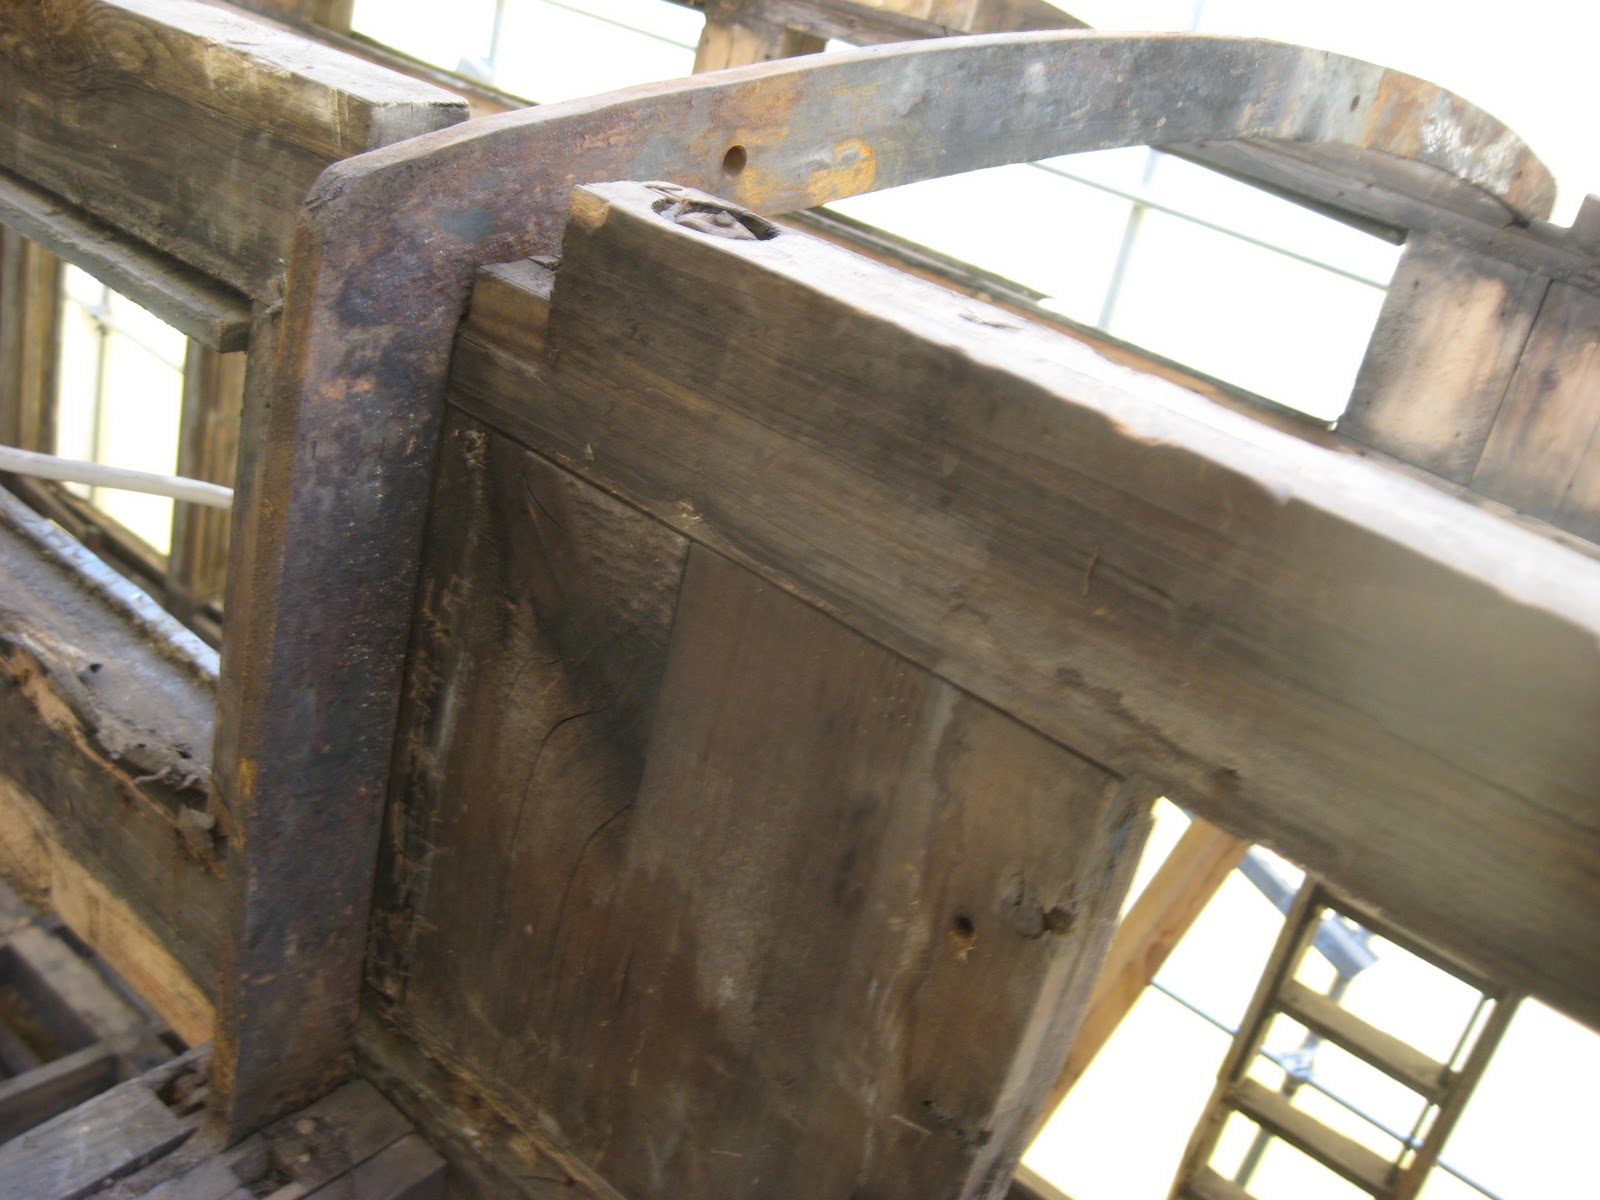
On Saturday, after clamp removal, the beam was run through the planer several times to get it down to the proper dimensions, and taken several blocks to the work site as shown on the right, above.  It even looks quite straight.  The sill that will be replaced is the lower one adjacent to the new beam.  The vertical and horizontal framing members are mortised into the existing sill, so more work will need to be done on the new one before it is ready.


Craig has also been busy with other things.  He has built new doors using the original hardware (cleaned up beautifully), with molding and sliding windows duplicated from the the old ones.  He also has made arched carlines to replace bad ones as necessary in the roof structure.
Meanwhile, on our regular work session on Saturday, most of the west platform has been uncovered showing the framing structure.  The platforms are cantilevered from the under carriage of the car, and were finished with tongue-and-groove decking that is quite deteriorated. 
Bob and I continued cutting and threading tie rods to replace rusted ones.  We finished this project on Saturday, and made some extras, as well as threading pieces for use in the future on other projects.  Note the always handy roll of duct tape.


Wednesday, April 6, 2011

Details....

We had a relatively small crew this day, but work proceeded on threading truss rods as well as removing roof decking and site clean-up.  Each work session more construction details become apparent to us.  On the left, above, a bolt head is visible on the face of the sill at the roof junction which appears to be a lag bolt.  However, in the photo on the right, above, it can be seen that there are nuts on these bolts that have been inset into the roof support.


In the photo on the left, above, John is making some adjustments to wiring (temporary), while Glenn, our chronicler and resident structural engineer looks on.  The wood stacked next to John consists of framing pieces that Craig has made to replace ones in that corner of the car as the lower (deteriorated) sill plate is replaced.  On the right, above, it can be seen that the sill at the roof edge at the junction with the wall is bevelled on the inside to conform to the curvature of the ceiling so that there was a smooth transition between wall and ceiling.


Finally, at the end of the canopies, the framing members are dovetailed together as shown in the above photos.  In addition, the side member is beveled to take the end fascia, also beveled to make a well detailed corner.

Wednesday, March 30, 2011

Misc. March 19,2011

There are steel arch braces spaced periodically in the roof between wood arches as shown in the photo on the left, above, taken from within the car looking up.  They have a vertical component within the framing between clerestory windows, then follow the curve of the roof below the windows and are fastened to the sill plate at the roof edge.  The photo on the right shows the vertical portion with the exterior siding removed.  (Single click on the photos to enlarge, back arrow in the browser to return to blog.)

This series of photos shows the arches with wood removed.  On the left, above, the arch and vertical portion can be seen, and on the right part of the lower arch sandwiched between framing members extends out to the left in the photo.


The view on the right shows the lower arch from above.   The steel is bolted in place at each end of the arch.  Some remaining roof decking can be seen in the upper part of the photo. 


Activities this day included stripping paint from the end panelling by Craig on the left, above.  Some of the surface wood is usable, including the corner pieces which would be difficult to duplicate.  We welcomed Tom back for the first time in a while, and he is removing fascia on the left, above.

Meanwhile, Bob and I continued threading truss rods to replace rusted ones.  This machine makes it a pleasure compared to turning a die by hand.  We are making extras to be used on another project as long as we are at it.
A final note:  From photos John has pointed out that originally there was an emergency cord that went the length of the car, and was led through these openings at each end.  There were brass rings in each opening, and a remaining one can be seen in the photo on the right, above.  I don't believe it is known at this point just what function this cord had, i.e. an alarm of some sort or an actual emergency brake.  Nevertheless, it probably wouldn't survive kids playing with it these days.

In absentia, March 5, 2011

I missed this work session, but obtained photos from Glenn Hall, as well as taking a few the following week myself.


Planning has begun for beefing up the framing with steel, as well as obtaining trucks in order to operate the car on the rails.  The photo on the left, above, shows the pivot point for the the truck in the bottom of the photo near the center as viewed from above.  On the right, the pivot point is seen from below.  Steel will be used to reinforce the floor beams as well as the superstructure (not historically correct, but necessary by current standards).
In the photo on the left, above, the beam just above the rail, and parallel to it is tied to the frame of the car, and cantilevered out of the end to support the end platform.  On the right, above, Rich is working at removing this as it will be replaced.  Most of the floor framing is going to stay, except for the lower sill at this end of the car on Rich's left.  The plan is to replace this with a laminated beam that we will make, which will be spliced into the sill, replacing approsimately 1/3 of the length that has deteriorated.

Meanwhile, Craig was left with a pile of wood scraps from making new window frames, and had some time on a few snowy days, so constructed this model of the framing of 0252 (470) as it stands currently.  It is beautifully done, and an accurate reproduction to scale.  Great job, Craig.


Finally, Tom continued work on the steps into the pit.  A future safety railing can be seen in the background to the left.

Friday, February 25, 2011

Varied tasks, Feb. 19, 2011


Most of the vertical tie rods (see previous posts) are rusted and all are being replaced.  Craig located the stock locally, but they needed to be cut to length and threaded.  George, John, and Bob were busy at this last Saturday.


More of the roof decking was removed, and I believe most, if not all of the decking will be replaced.  Some is in fair shape but probably not worth keeping.  On the right above, the war council (John, Tom, Glenn, and Craig) is holding a pow-wow to plan further activities.  Notice the plywood on the end platform of the car that Tom is standing on, and see below.

On the left, above, on the plywood platform, Glenn found what looks like a penny in these photos, but in fact is a WWII era ration token.  It may be possible to make out the lettering "OPA" and the number "1" in the photo on the right.  For those of you with less gray hair than most of us, these were used to obtain food during the wartime shortages when rationing was in effect.  Glenn recalls counting these out, and said this was a meat token.  This car was in maintenance-of-way service with the D&RG at this time, and was used as a REA office for a period as well.  One can only speculate where the token came from, but presumably fell from above during the removal of material from the roof or end of the car.
Finally, Tom and I built steps into the pit for access to the underside of the car.  These were built with "requisitioned" materials, but turned out quite nicely.

Sunday, February 6, 2011

Several projects (January 29,2011)

We had a large crew last Saturday, and worked in several different areas.  Rosemary (left above) and others removed the metal roof covering which was a fairly messy job.  Much of the roof decking is in decent shape, although there are areas that are badly deteriorated.  The portion that has been removed on the right above was done to get access to remove the part of the sill plate that is going to be replaced.  More on that later.

On the left, above, the decking looks pretty good in the near part of the photo, but not so good along the far edge.  On the right, above, shows the detail on one of the corners.  The joinery in general was well done when the car was built, but time has taken its toll.
Meanwhile, Craig and Ray are working on dismantling the west end of the car.  There was a single piece of wood over the door and extending down each end about 1/4 of the way that was screwed in with covered screw holes.  We had to go fishing for the screws to remove them.  On the right, George and Rich removed the end platform and cleaned up the framing.  Some large framing members will need replacing here.

We arrived on scene in the morning to find the south edge of the tent had come loose from the turnbuckles because of the strong winds experienced earlier.  So the turnbuckles were securely fastened to the rail with blocks and bolts which hopefully will solve that problem.  The east end of the tent also had been flapping in the wind, so the pipes in the pockets along the base were wedged under the rails here as well.


After completing the end cover on the west end last session there was no room for passage between the tent and the ramp from the trailer.  Tom and I spent the morning shortening the ramp and adding treads.  Tom is sorting on the platform, and Glenn and John are discussing strategy (watching trains?).

Last but certainly not least, Bob worked in the shop installing electrical service.  We are obtaining power from the roundhouse, and will have 120/240 for power tools, as well as lighting and radiant heaters.  More photos on this next time.  I often get so involved in what I am doing that I forget to take pictures.  Sorry, Bob.

Wednesday, January 19, 2011

Dried in (Jan. 15, 2011)

The COS crew raised and secured the west end cover for our shelter for 0252, aka 470, last Saturday.  The upper photo on the left shows the material in place, and pipe being fitted in the slot at the bottom.  In the right photo, in the upper left corner, rope has been tied to a corner of the material prior to raising.  The rope was then placed over the end hoop of the frame and tension applied to bring the material up and over the frame.  Another person was on the outside center ladder to help raise and direct the material over the the frame.       
               The photo on the left shows the top cover brought over the end cover and secured with turnbuckles at each lower corner.  There is a door on the west end for access for people, while on the east end there is a larger flap that can be raised (approx. 6x12 feet) for access.
The view on the right of the inside shows the room available for access to the car.  There is considerable space above to provide for planned raising of the car and placement of dollies underneath in the future.  The picture was taken with available light, and when there is sunshine the translucency of the fabric provides good light, at least on the south side.  We also can get a fair amount of solar warming.

Followers

Blog Archive